Huawei
Onboarding for Using the OCMP Splash Page (Smart WiFi)
Several steps are required to configure Huawei access points in Huawei iMaster NCE for OCMP. Because the Huawei iMaster API is used, a user also needs to be created.
Creating a Huawei API User Group
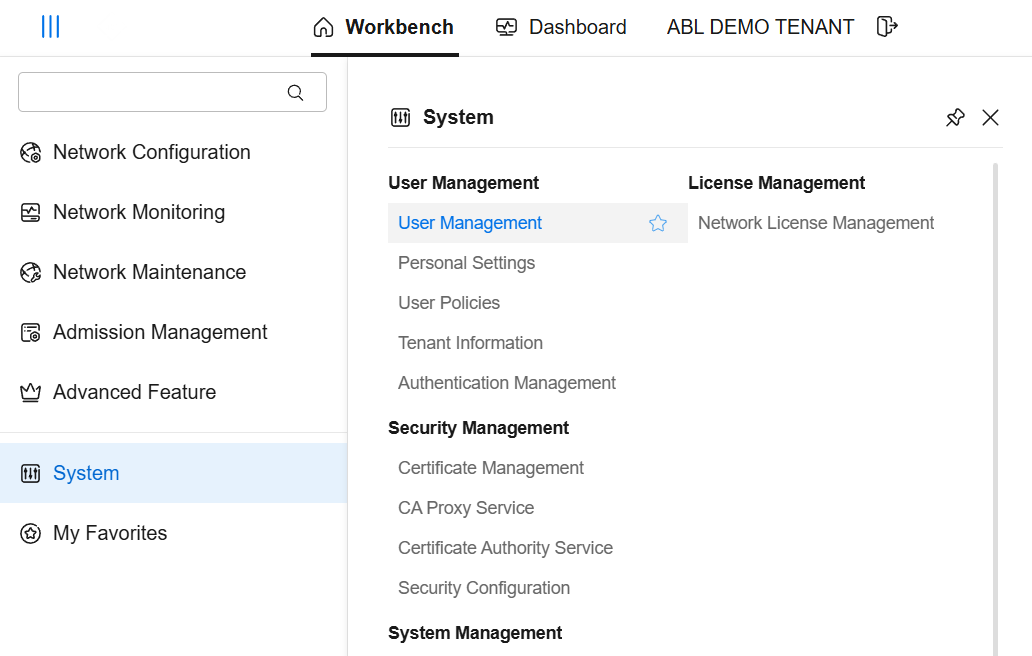
In Huawei iMaster NCE, a user group for API access is required first. Navigate to System → User Management and open the user groups area.

If no suitable group exists yet, create a new one at this point.
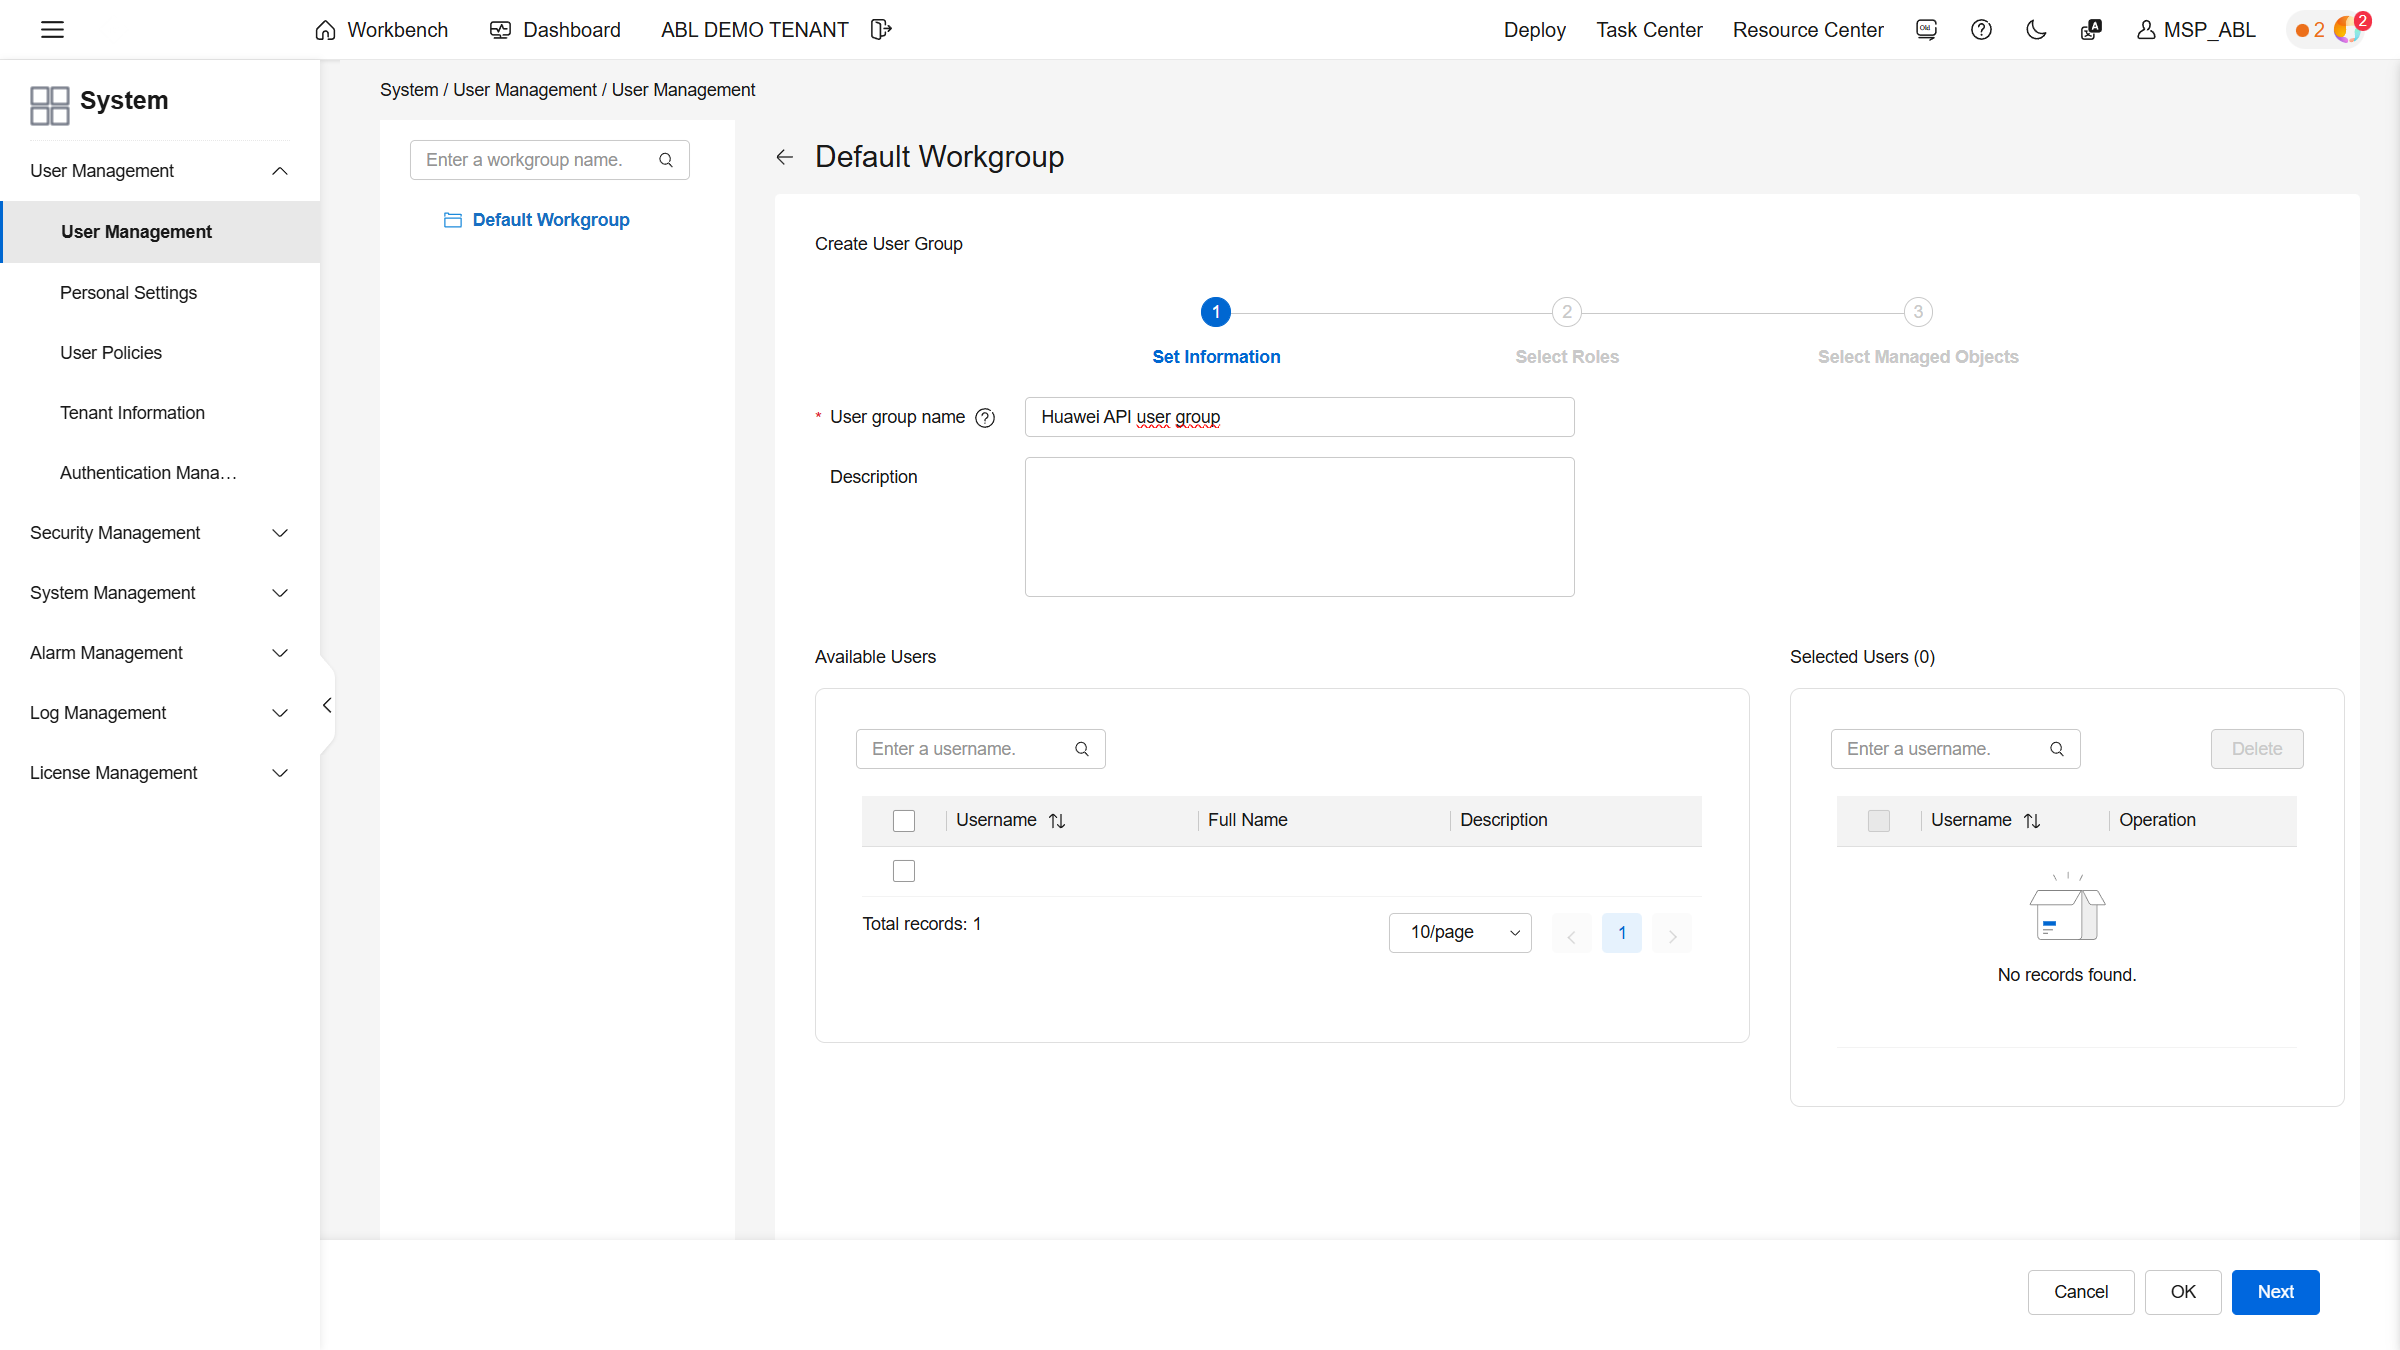
Assign a suitable name so that the group can later be identified clearly as the API group for OCMP. In the next step, define the roles for this group.
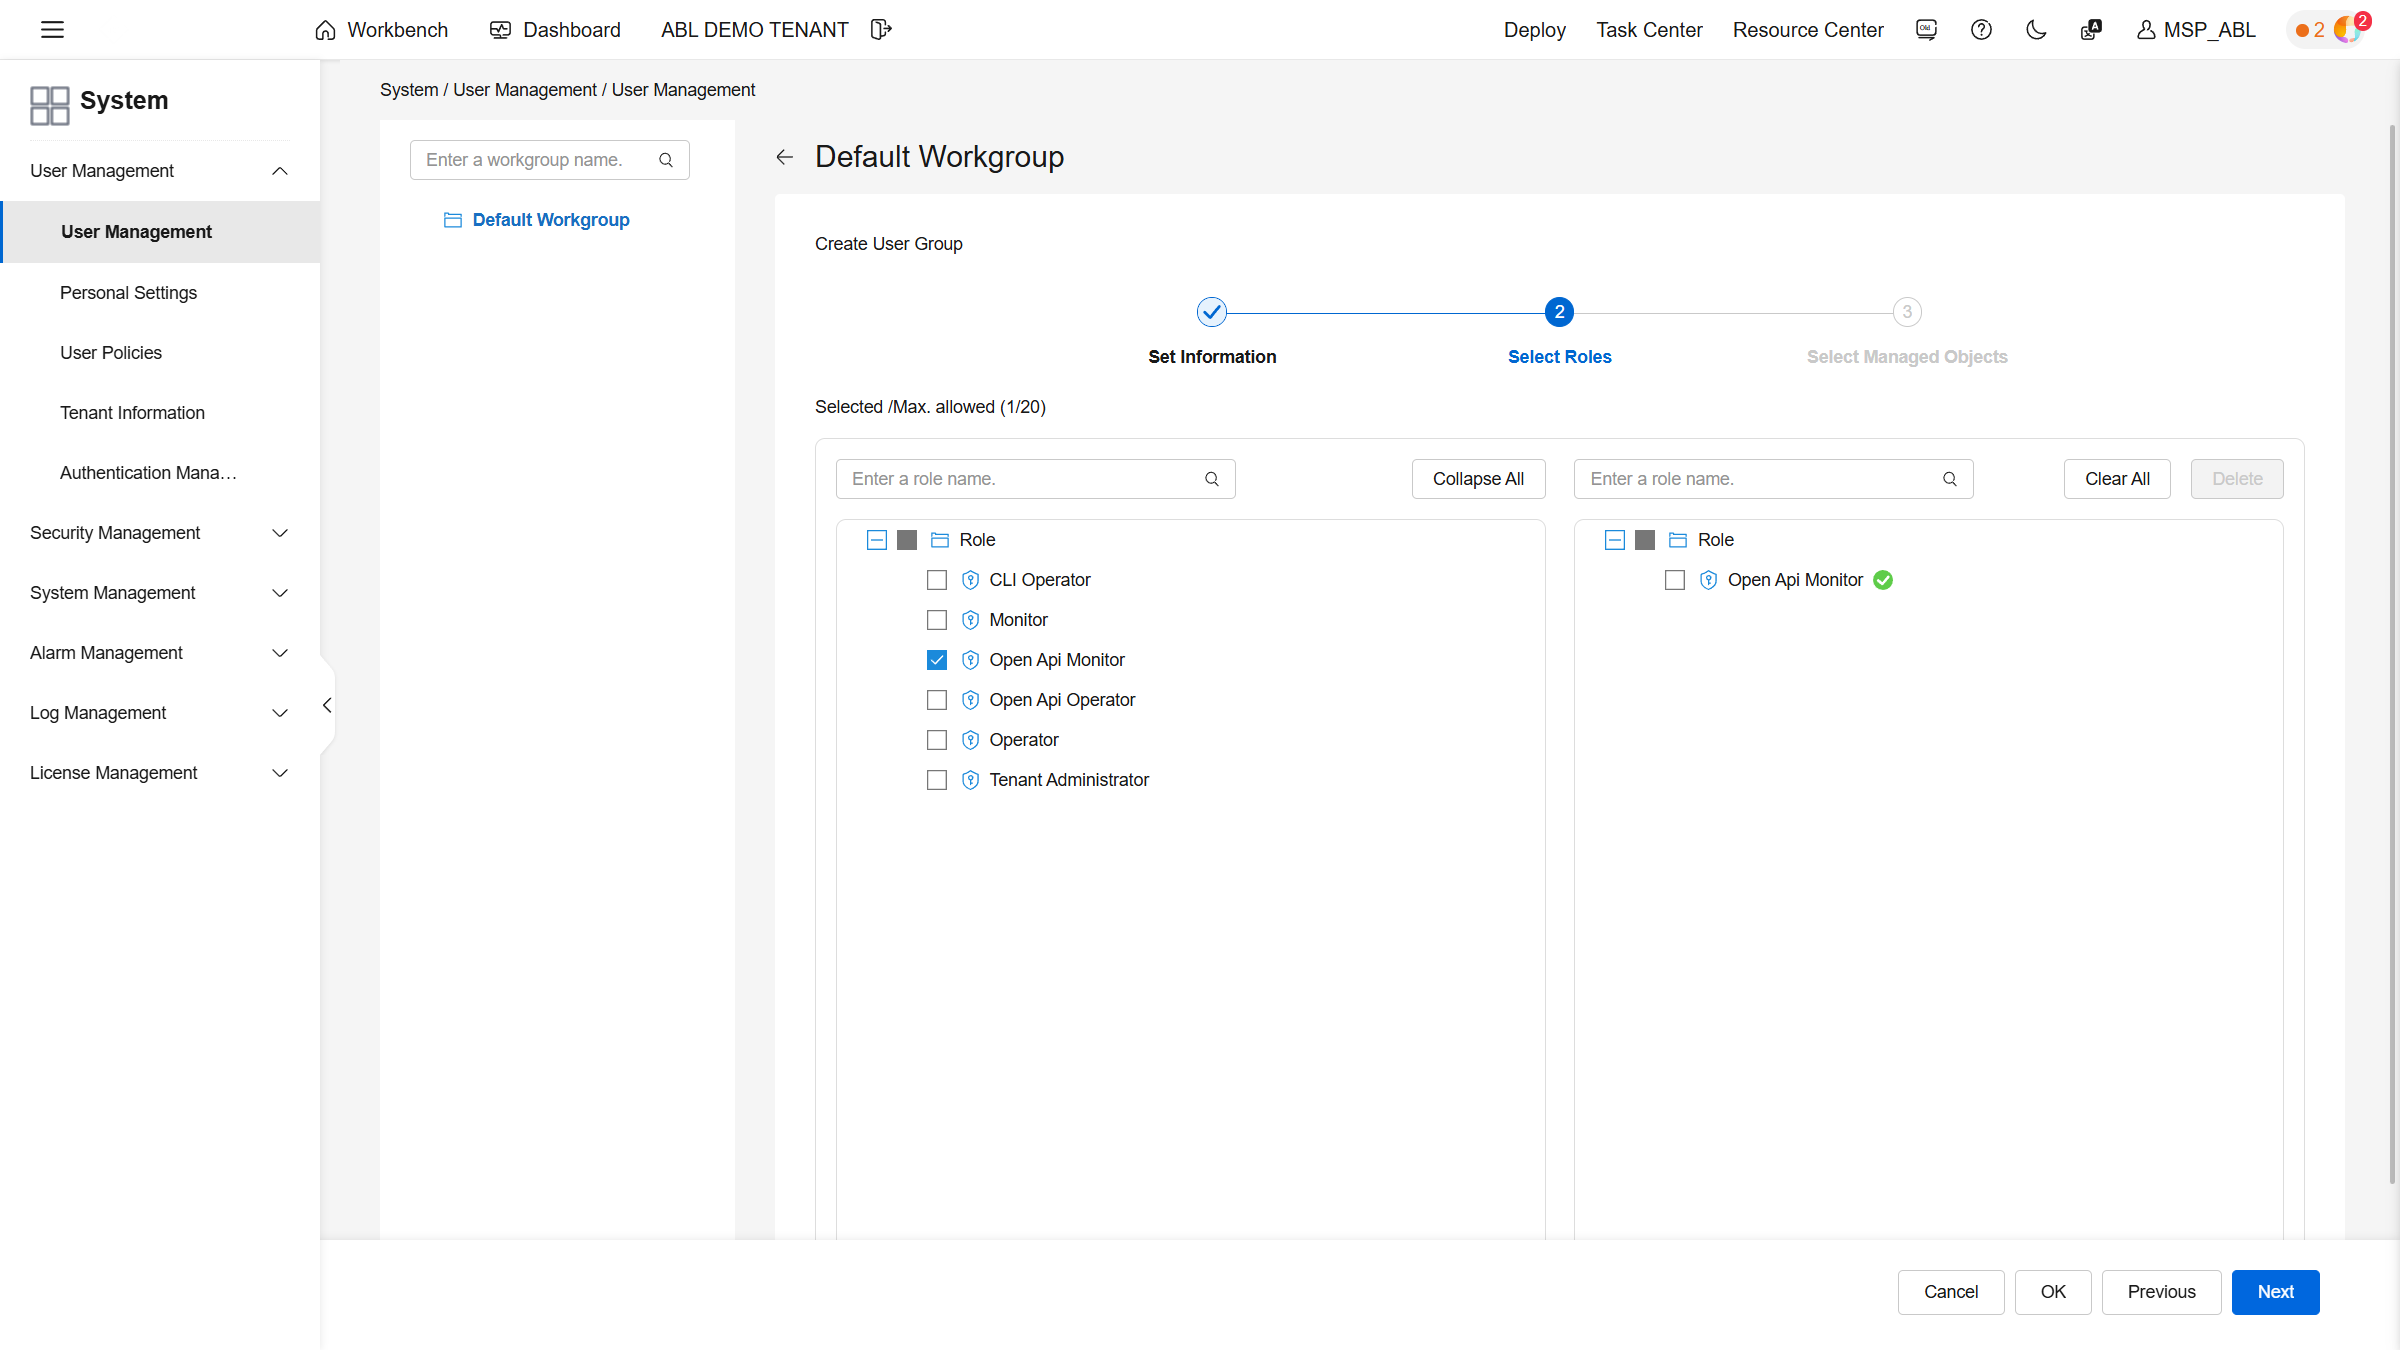
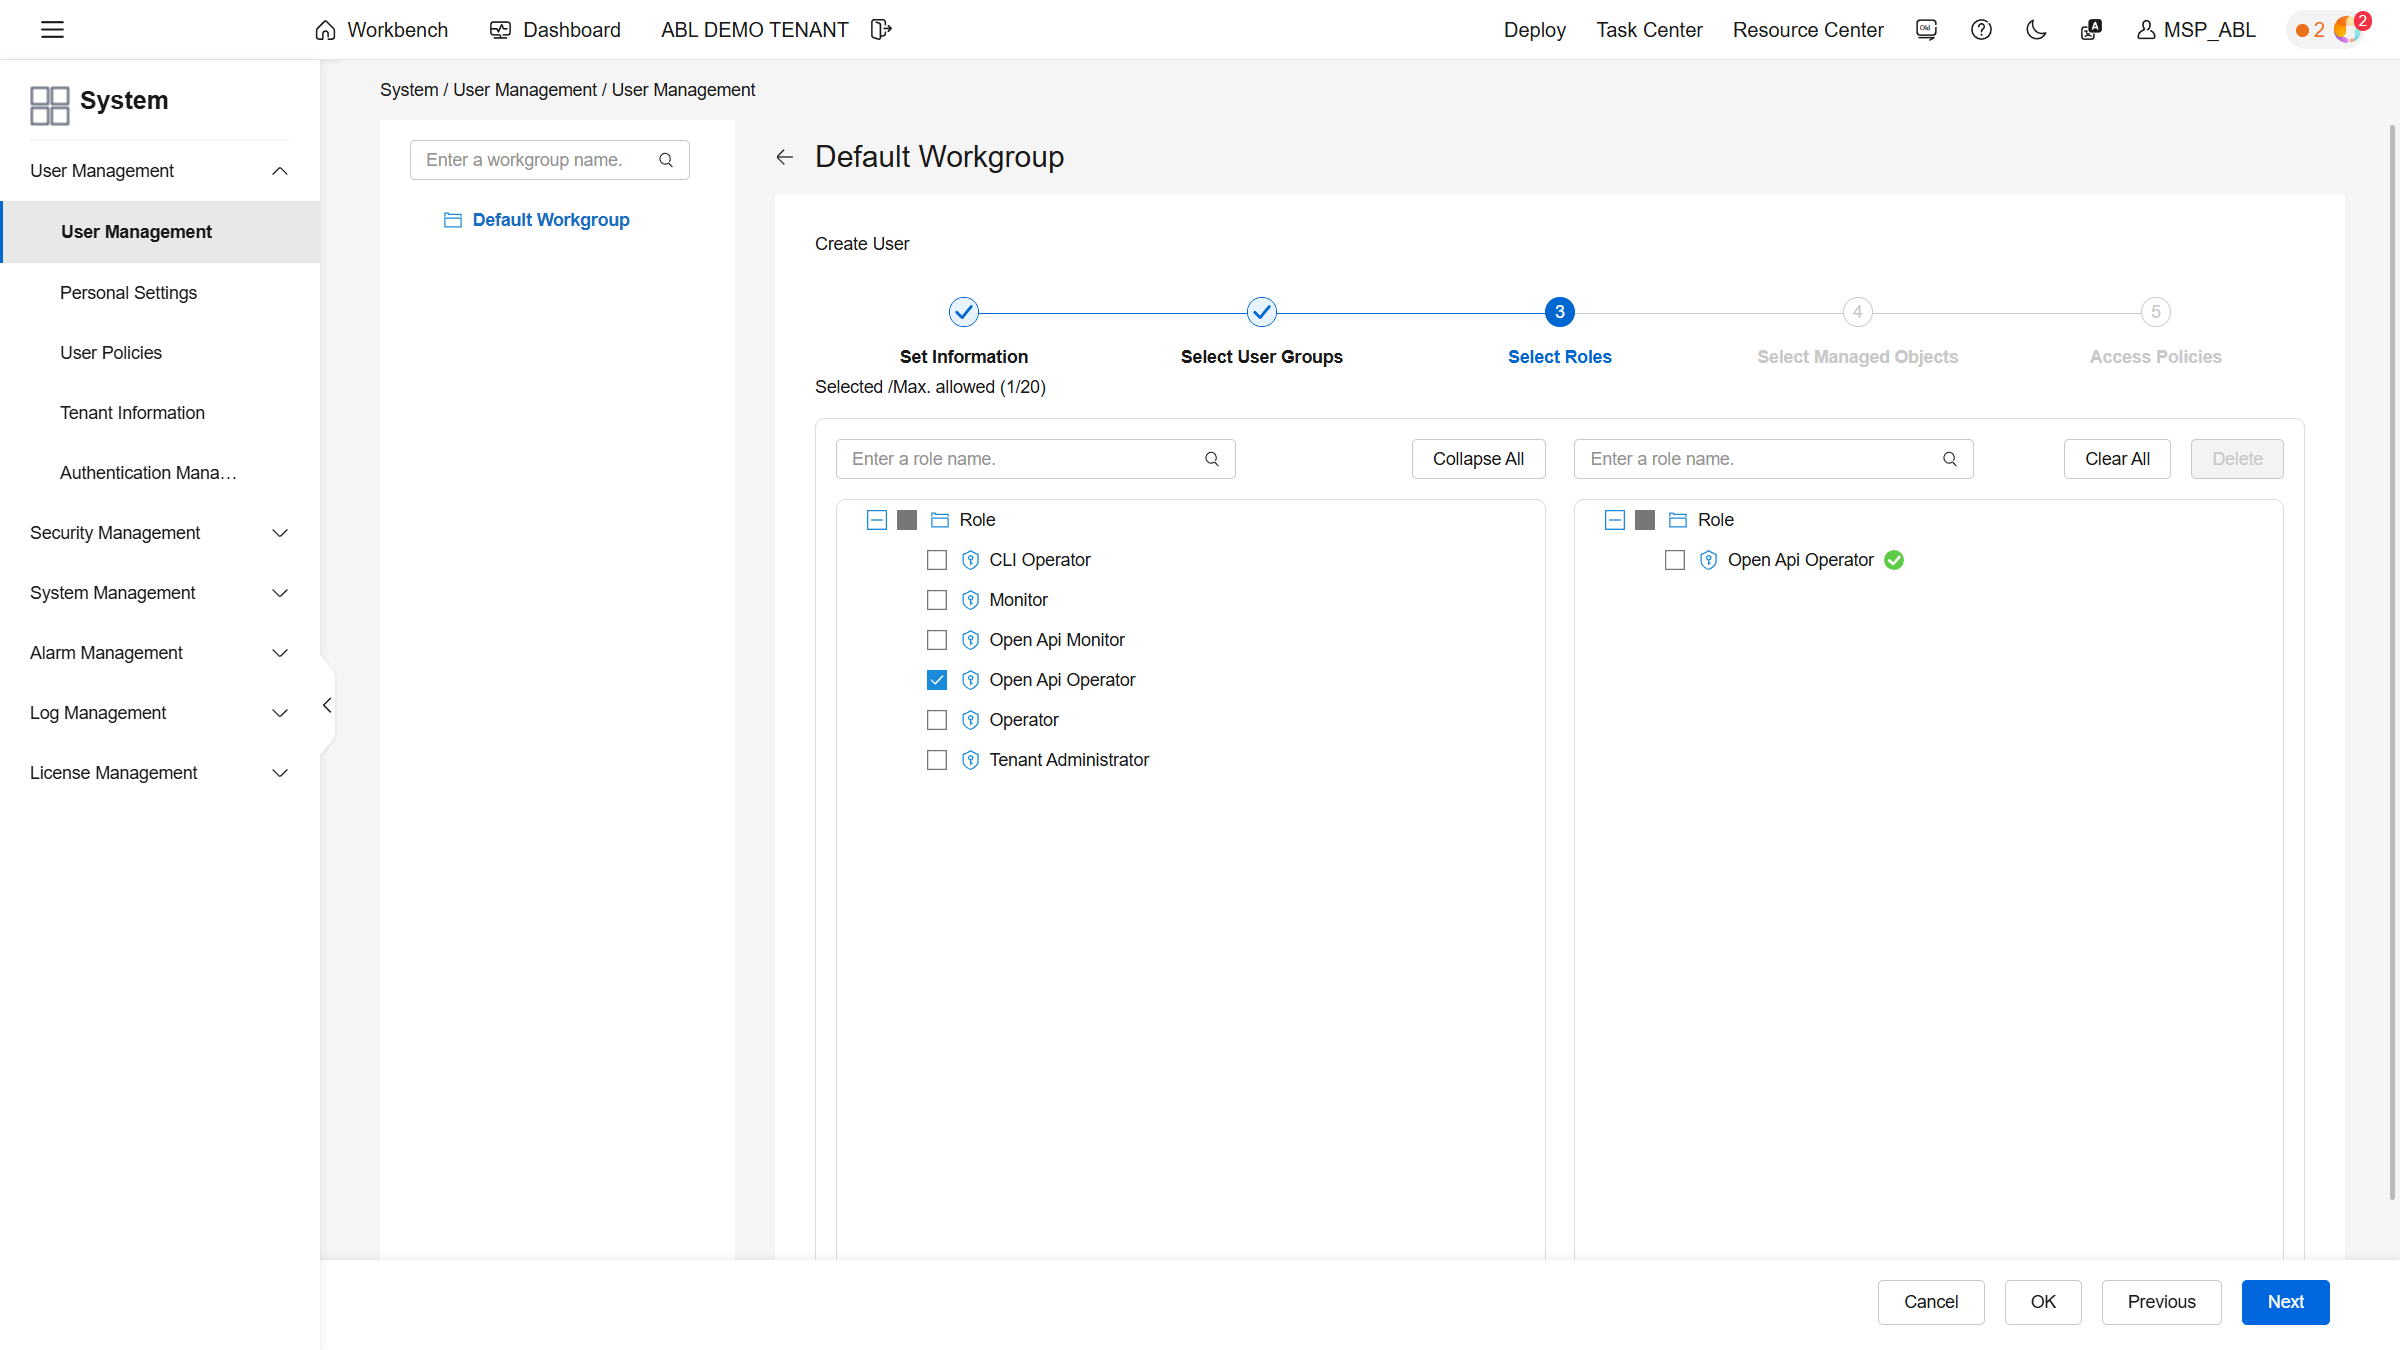
Select the Open Api Operator role so that the user later receives the required API permissions.
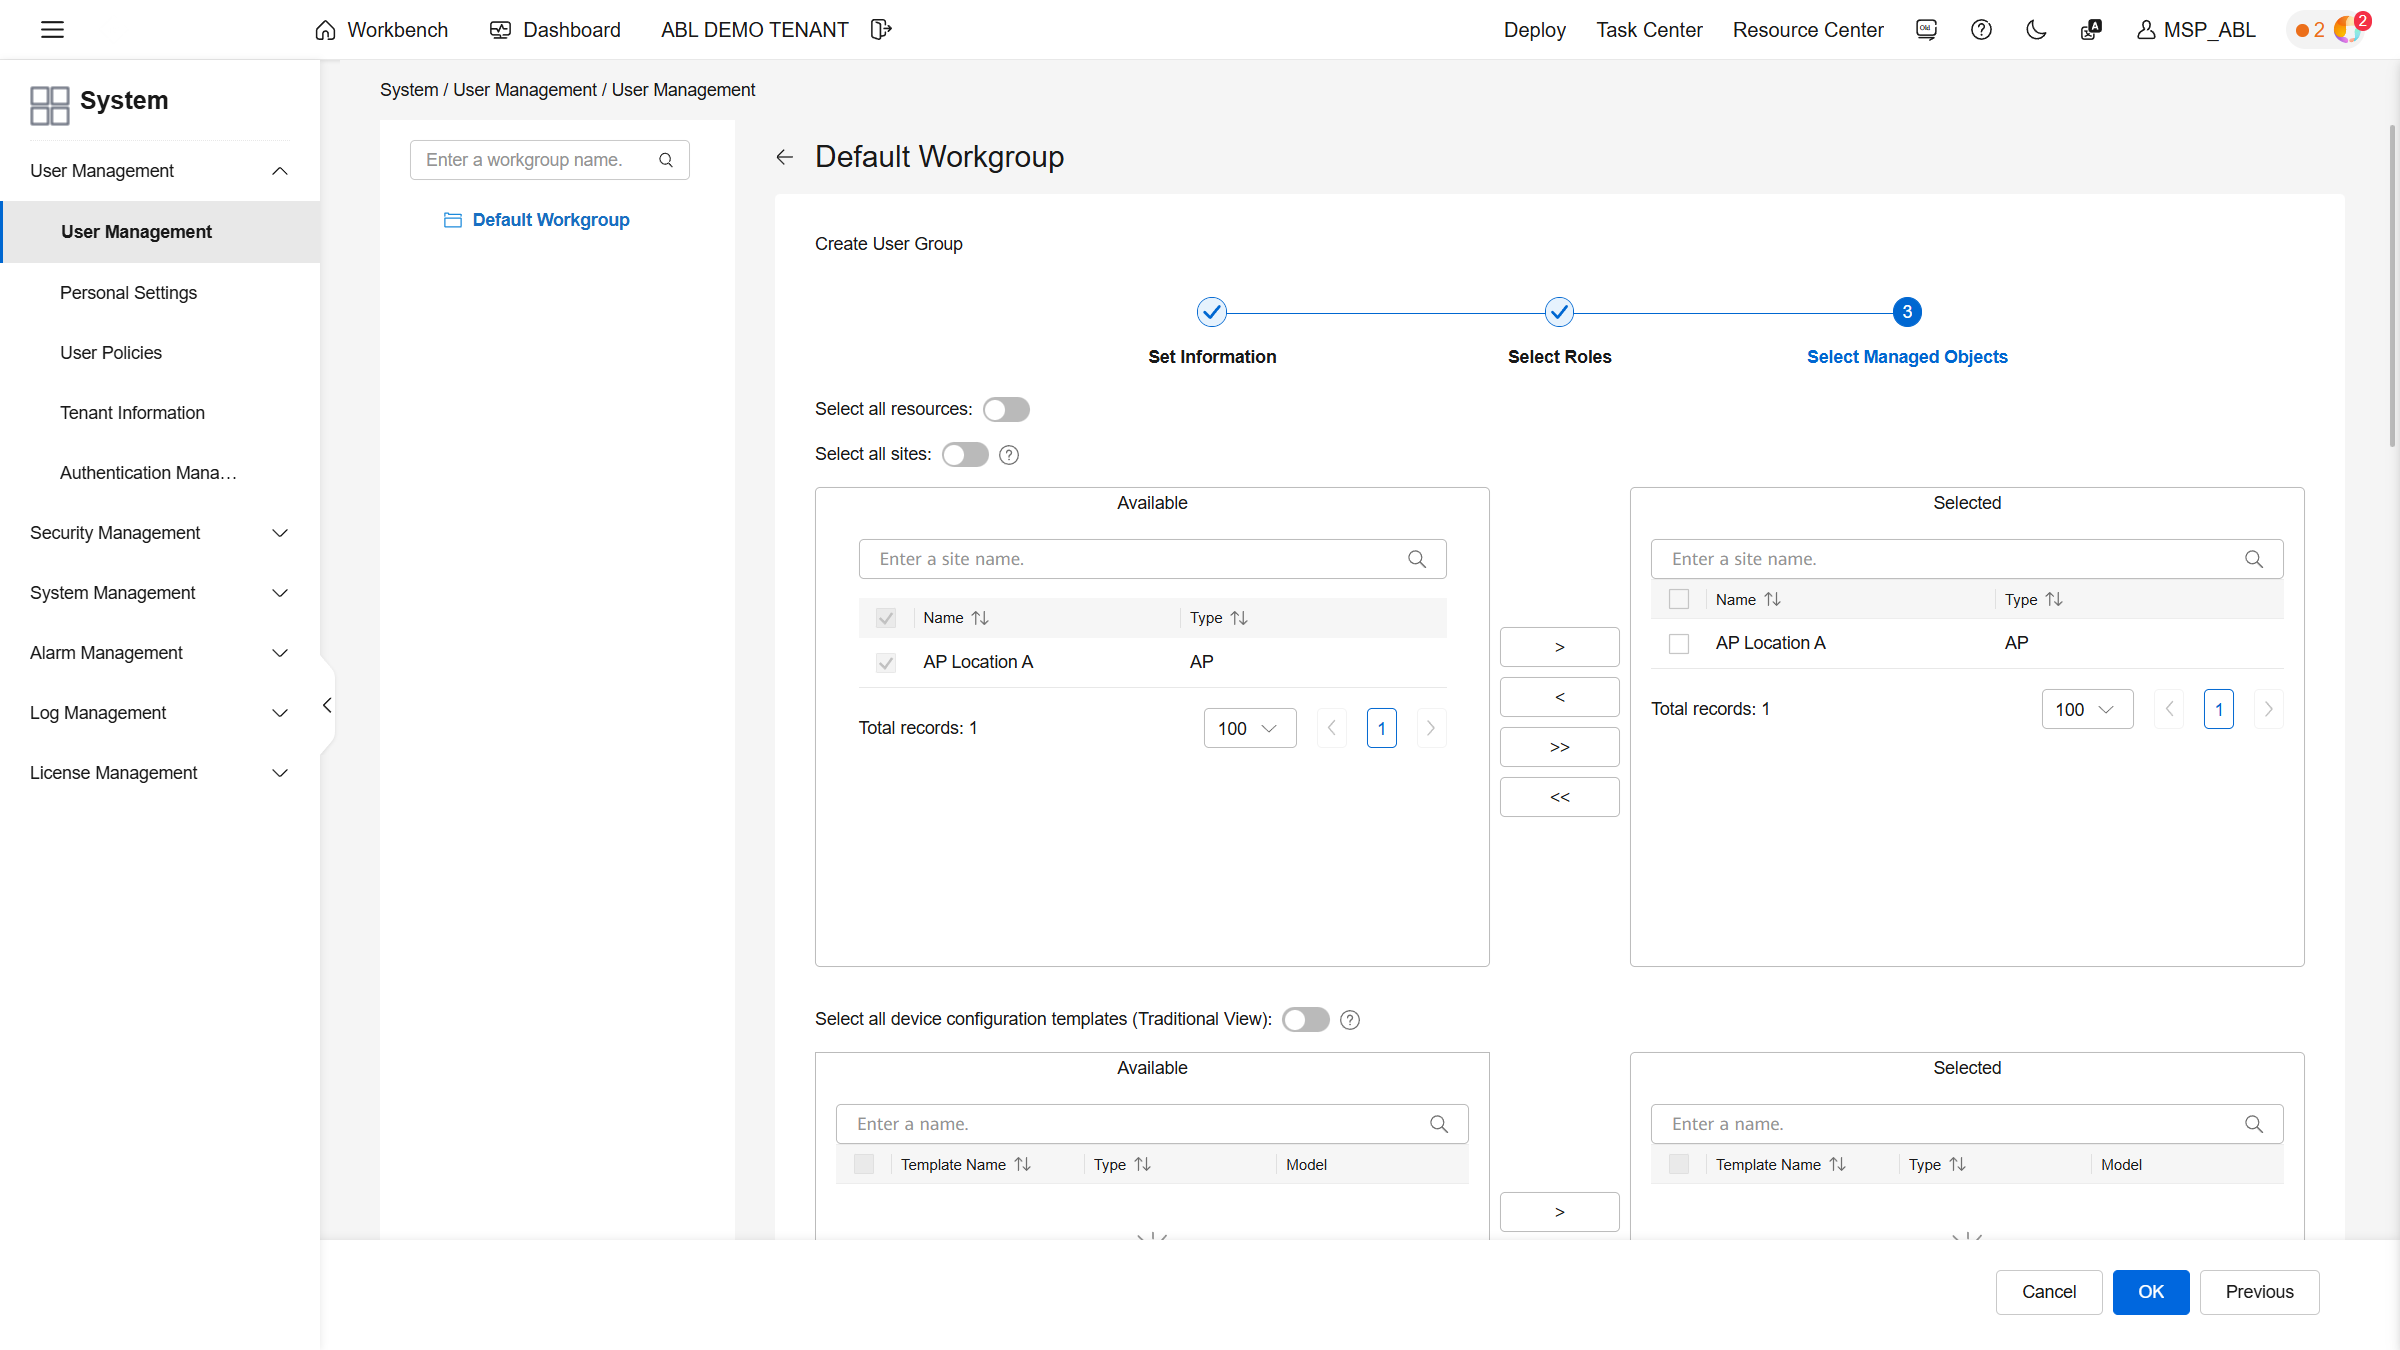
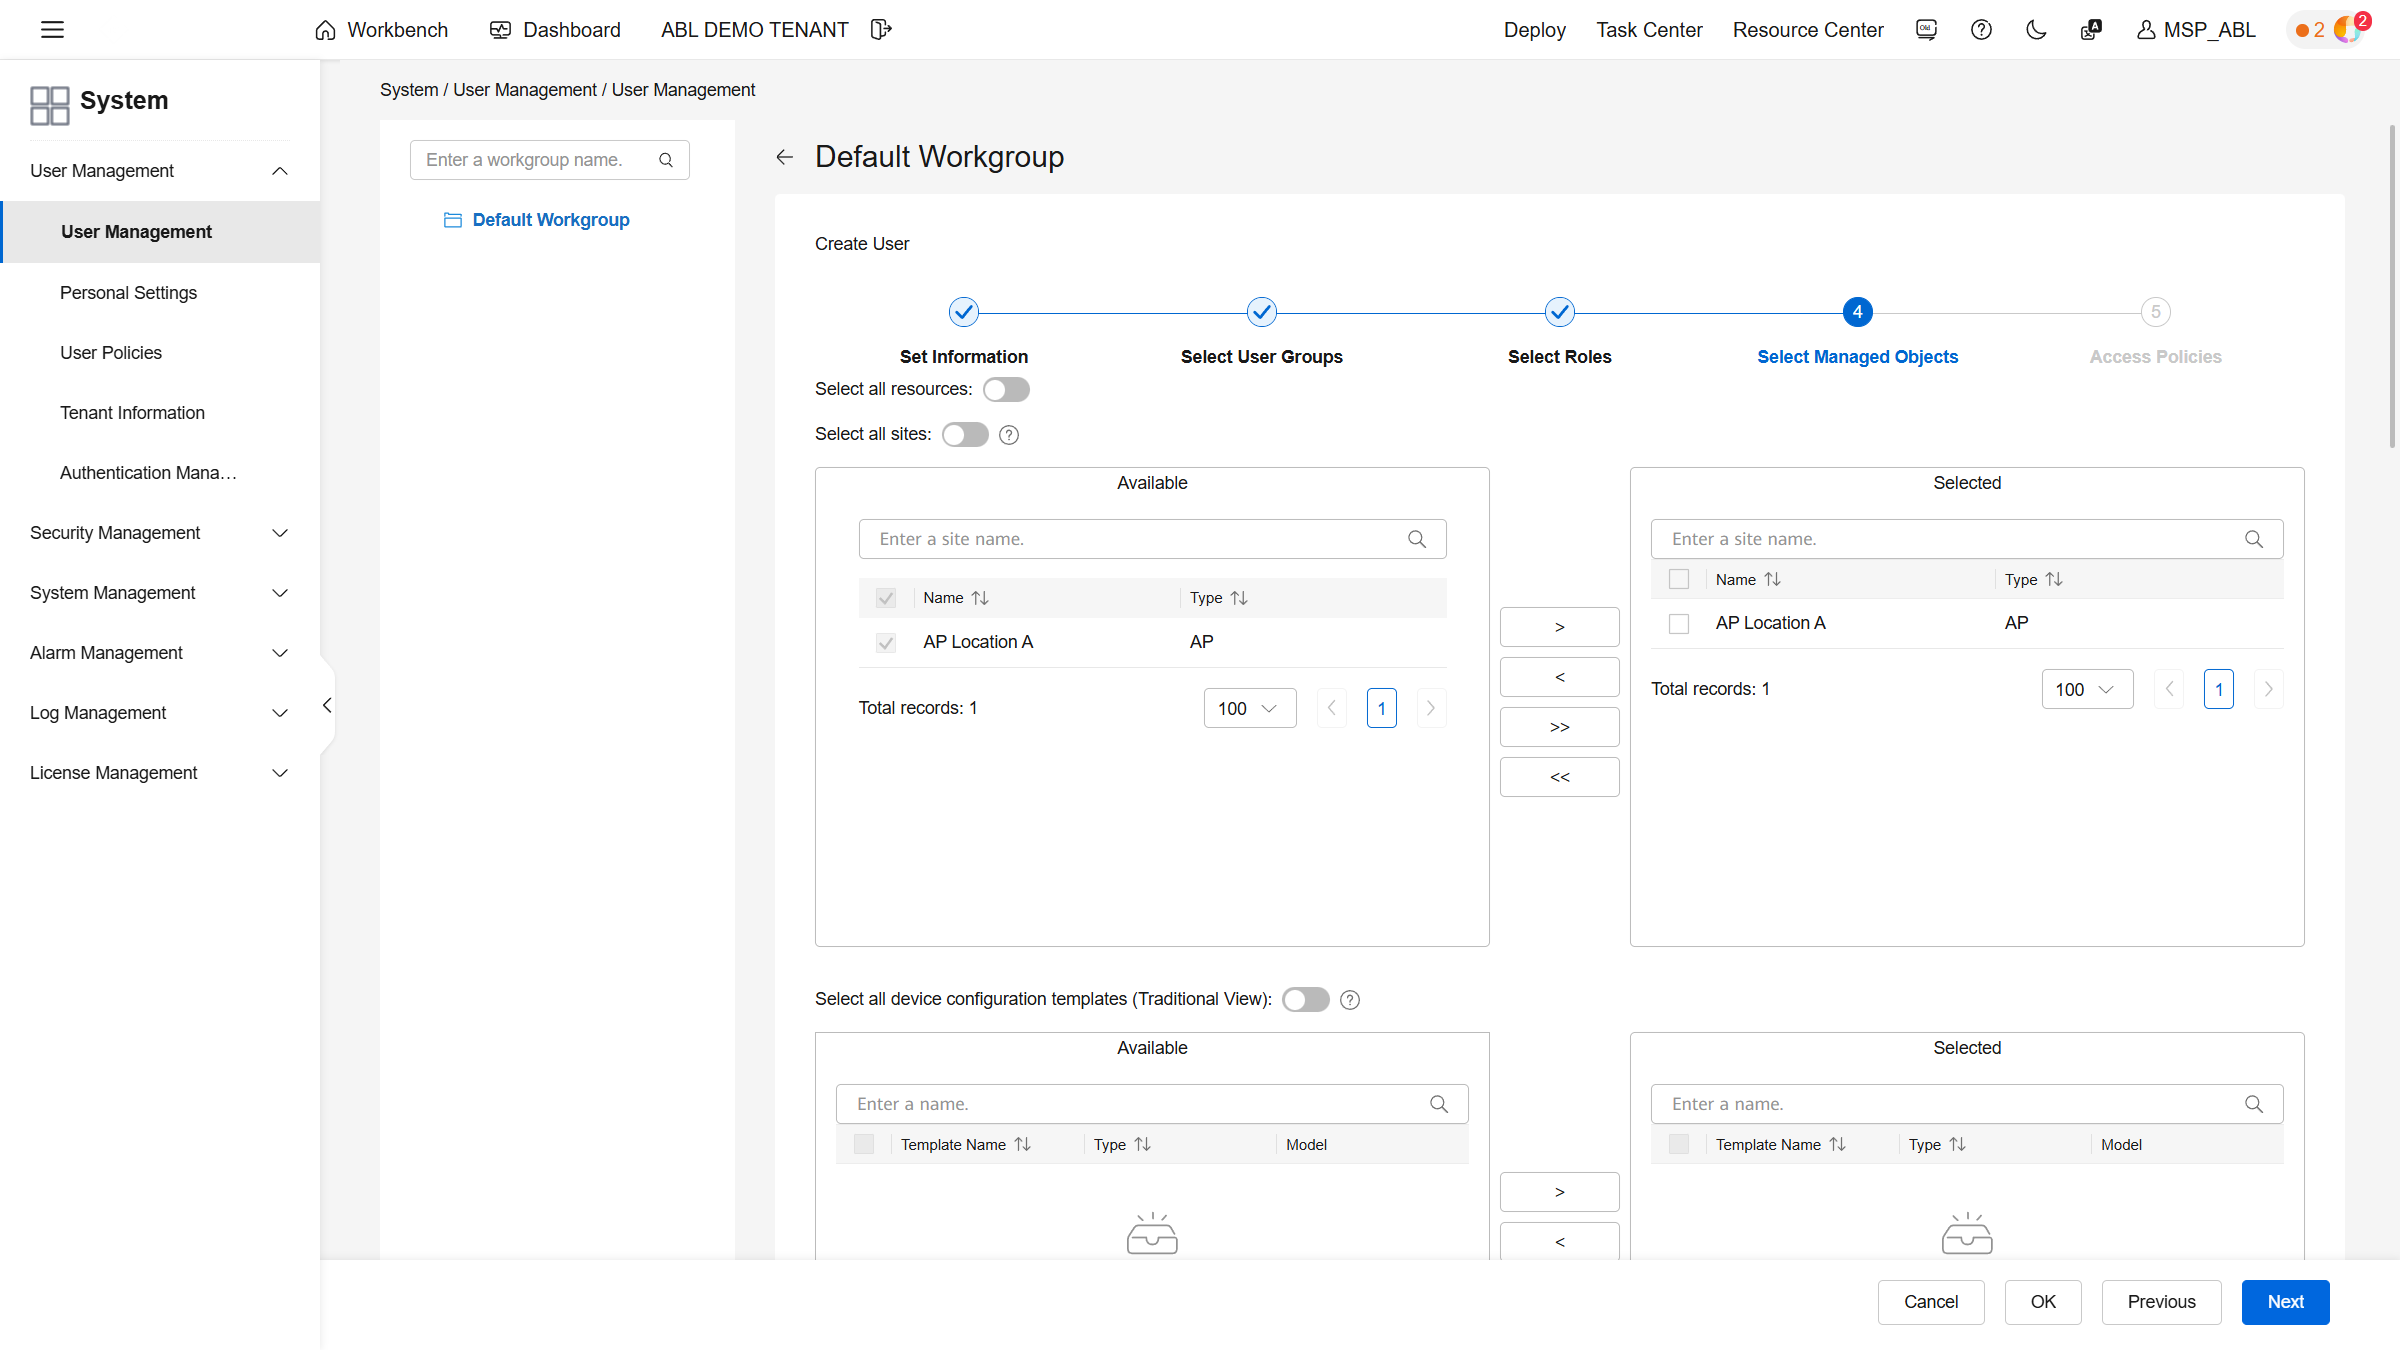
Once the role has been set, select all available resources so that the access required for the later integration is fully available.
Creating a Huawei API User
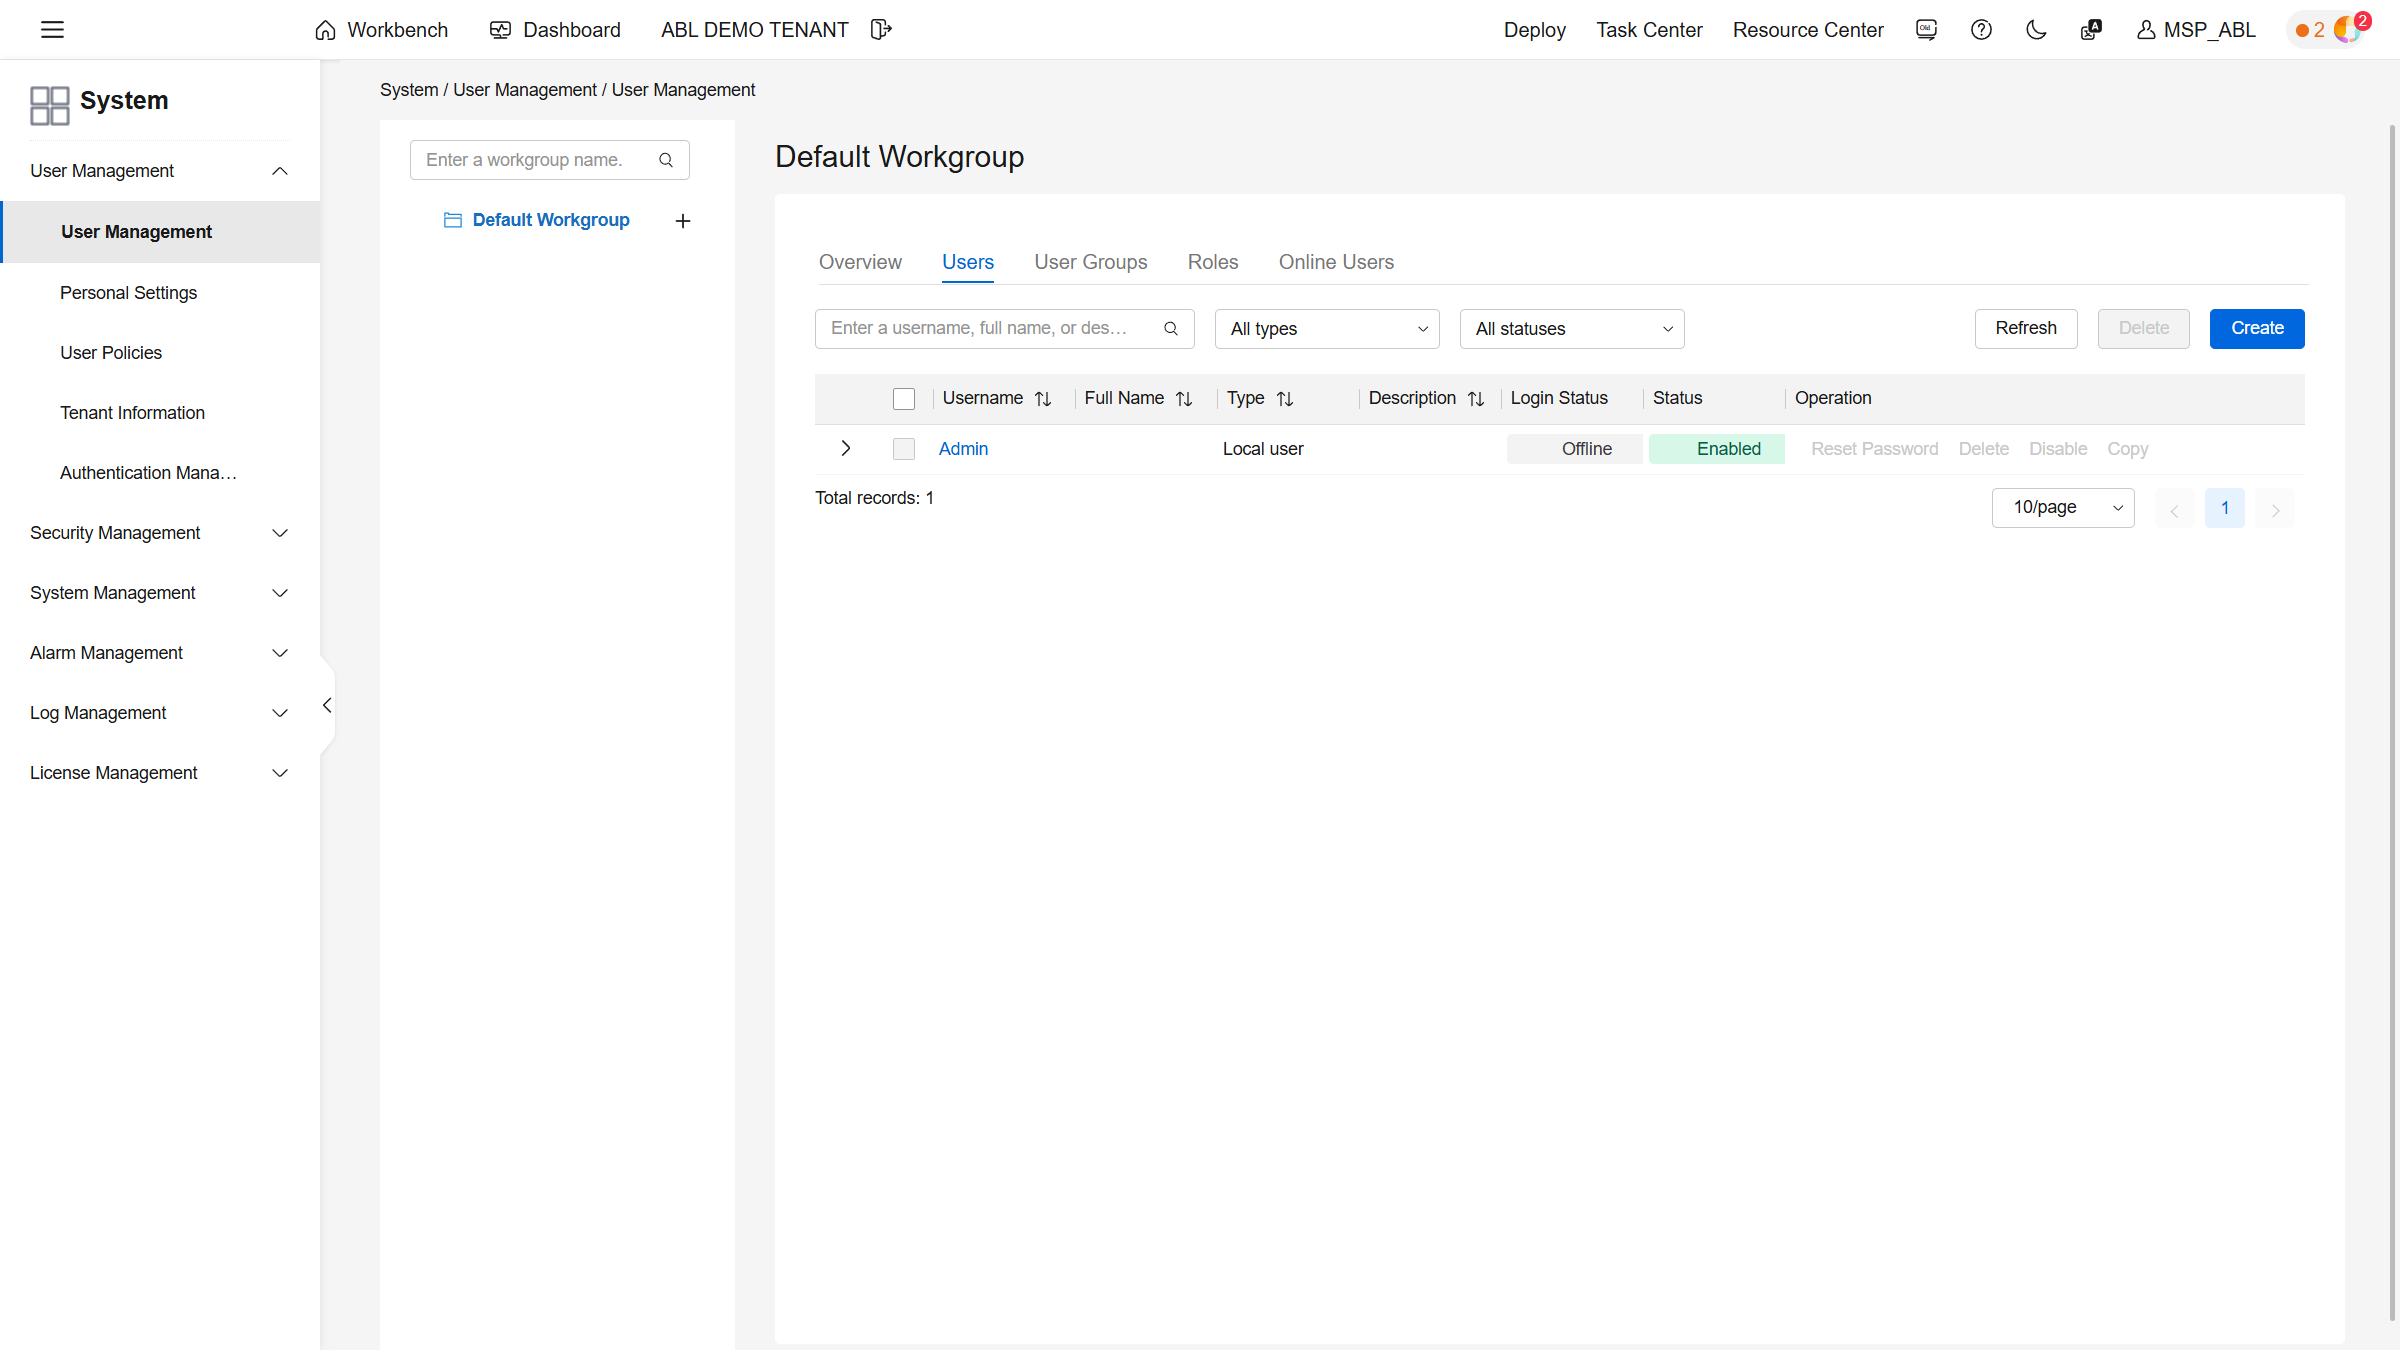
In the same area, create a new user.
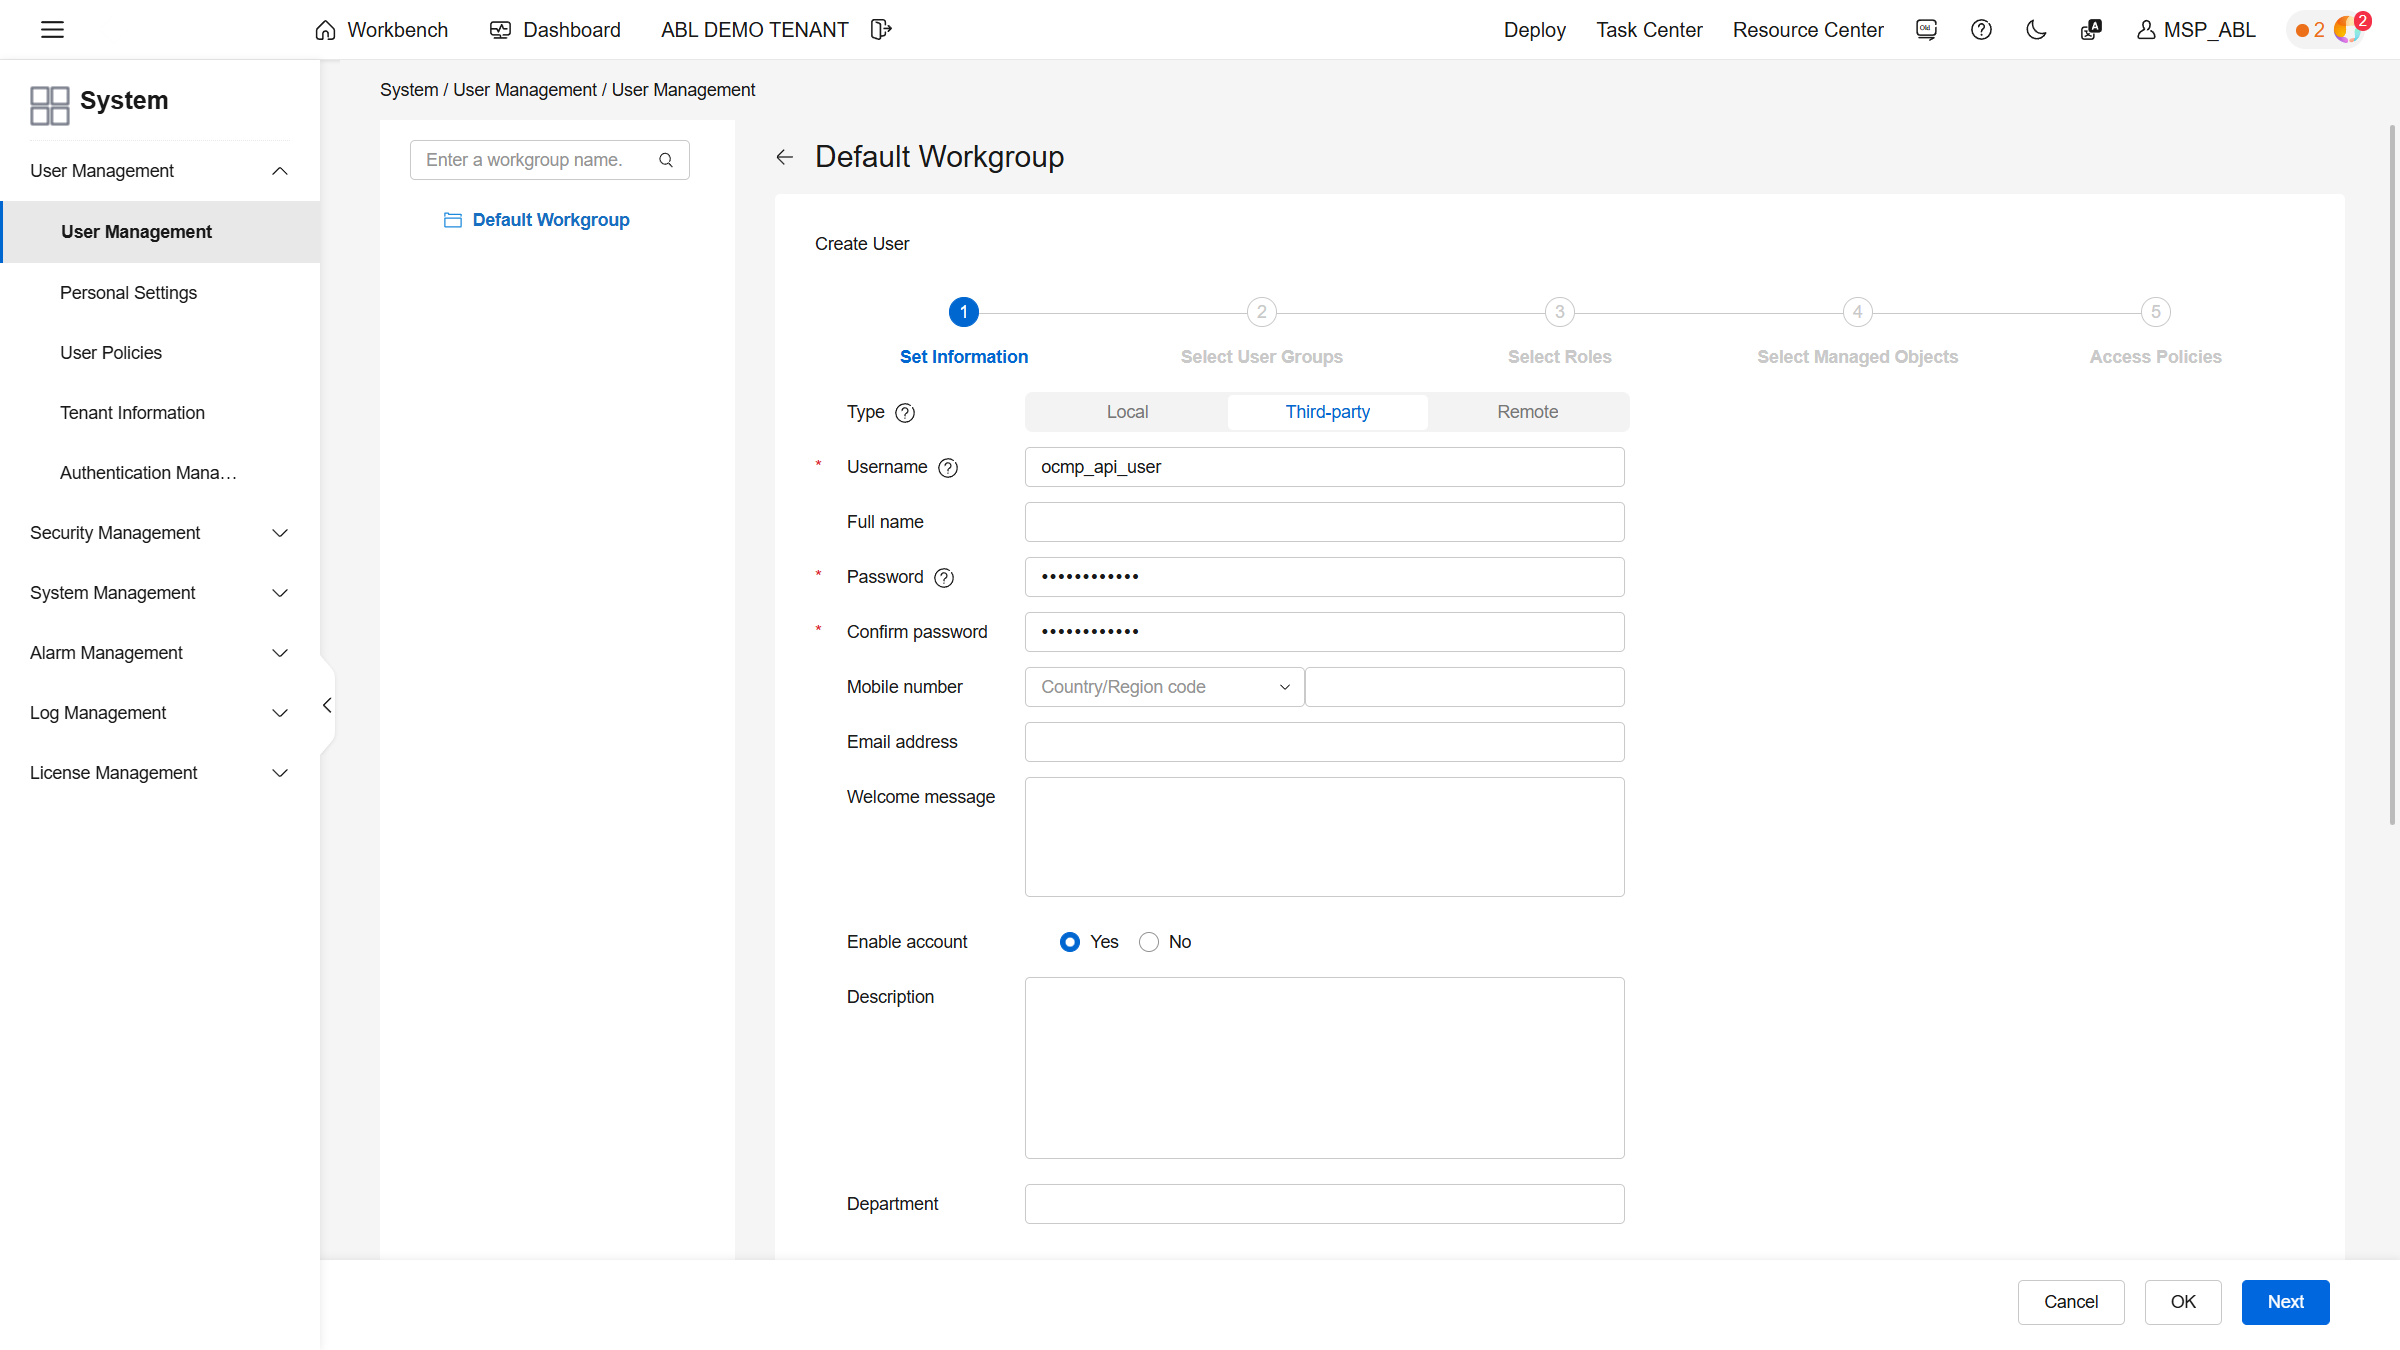
Create the user as a Third-party user. A recommended username is ocmp_api_user. Use a strong password and store it securely.
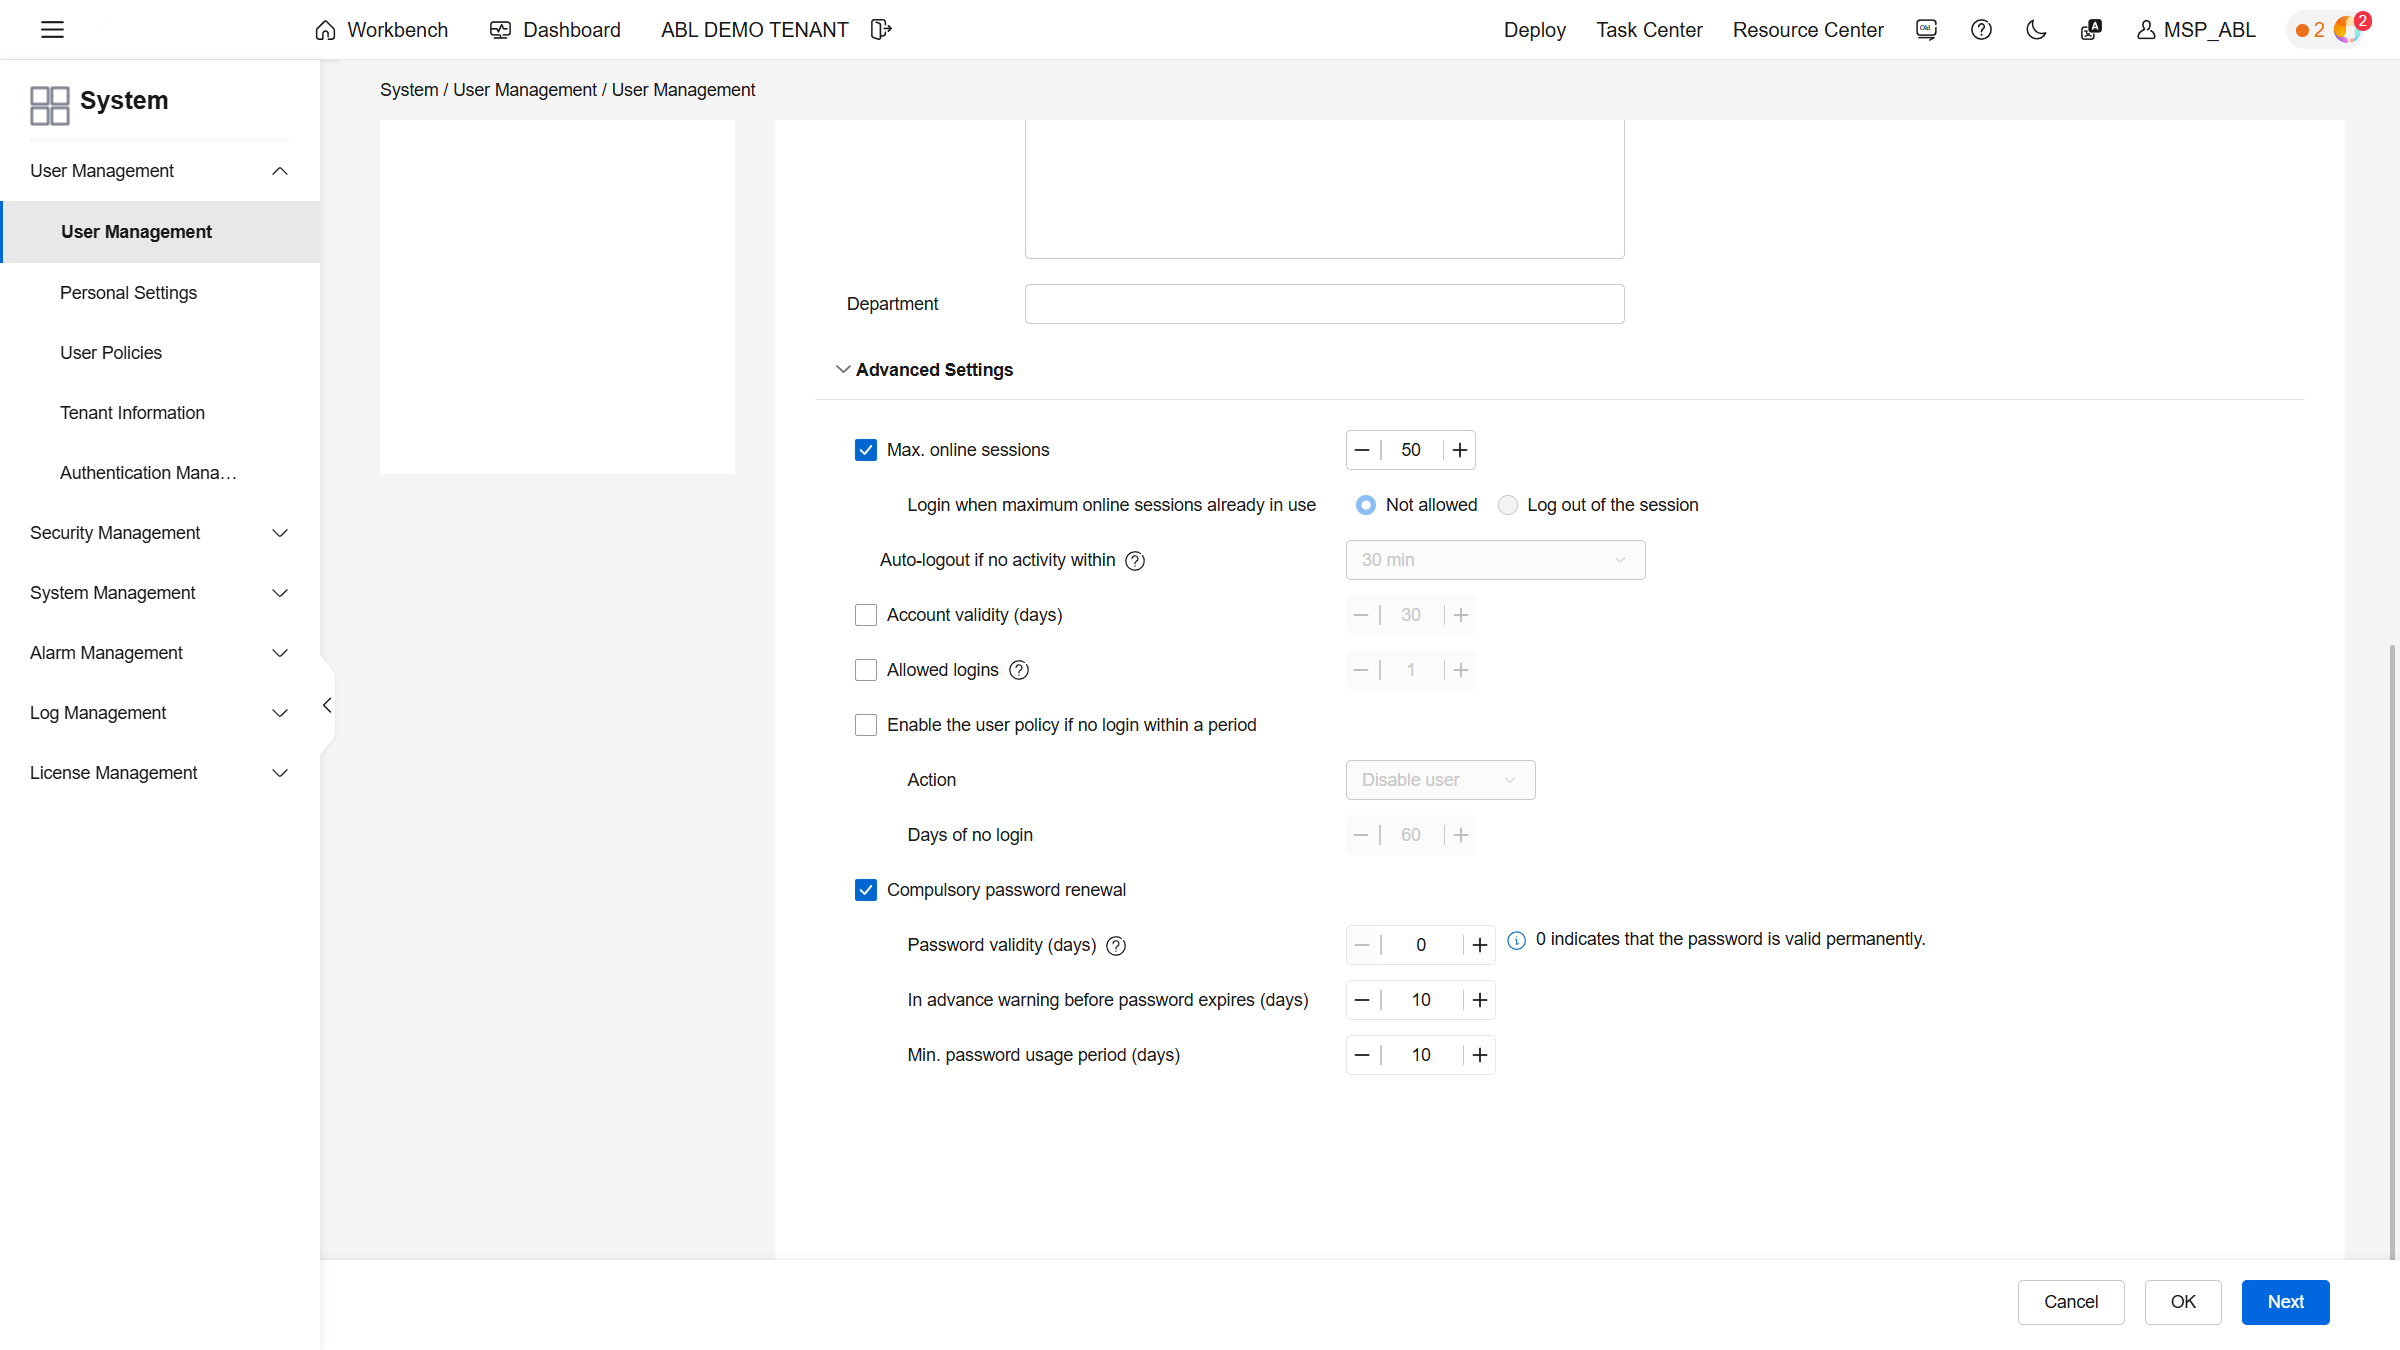
In the advanced settings, increase the maximum number of simultaneous sessions and disable password renewal.
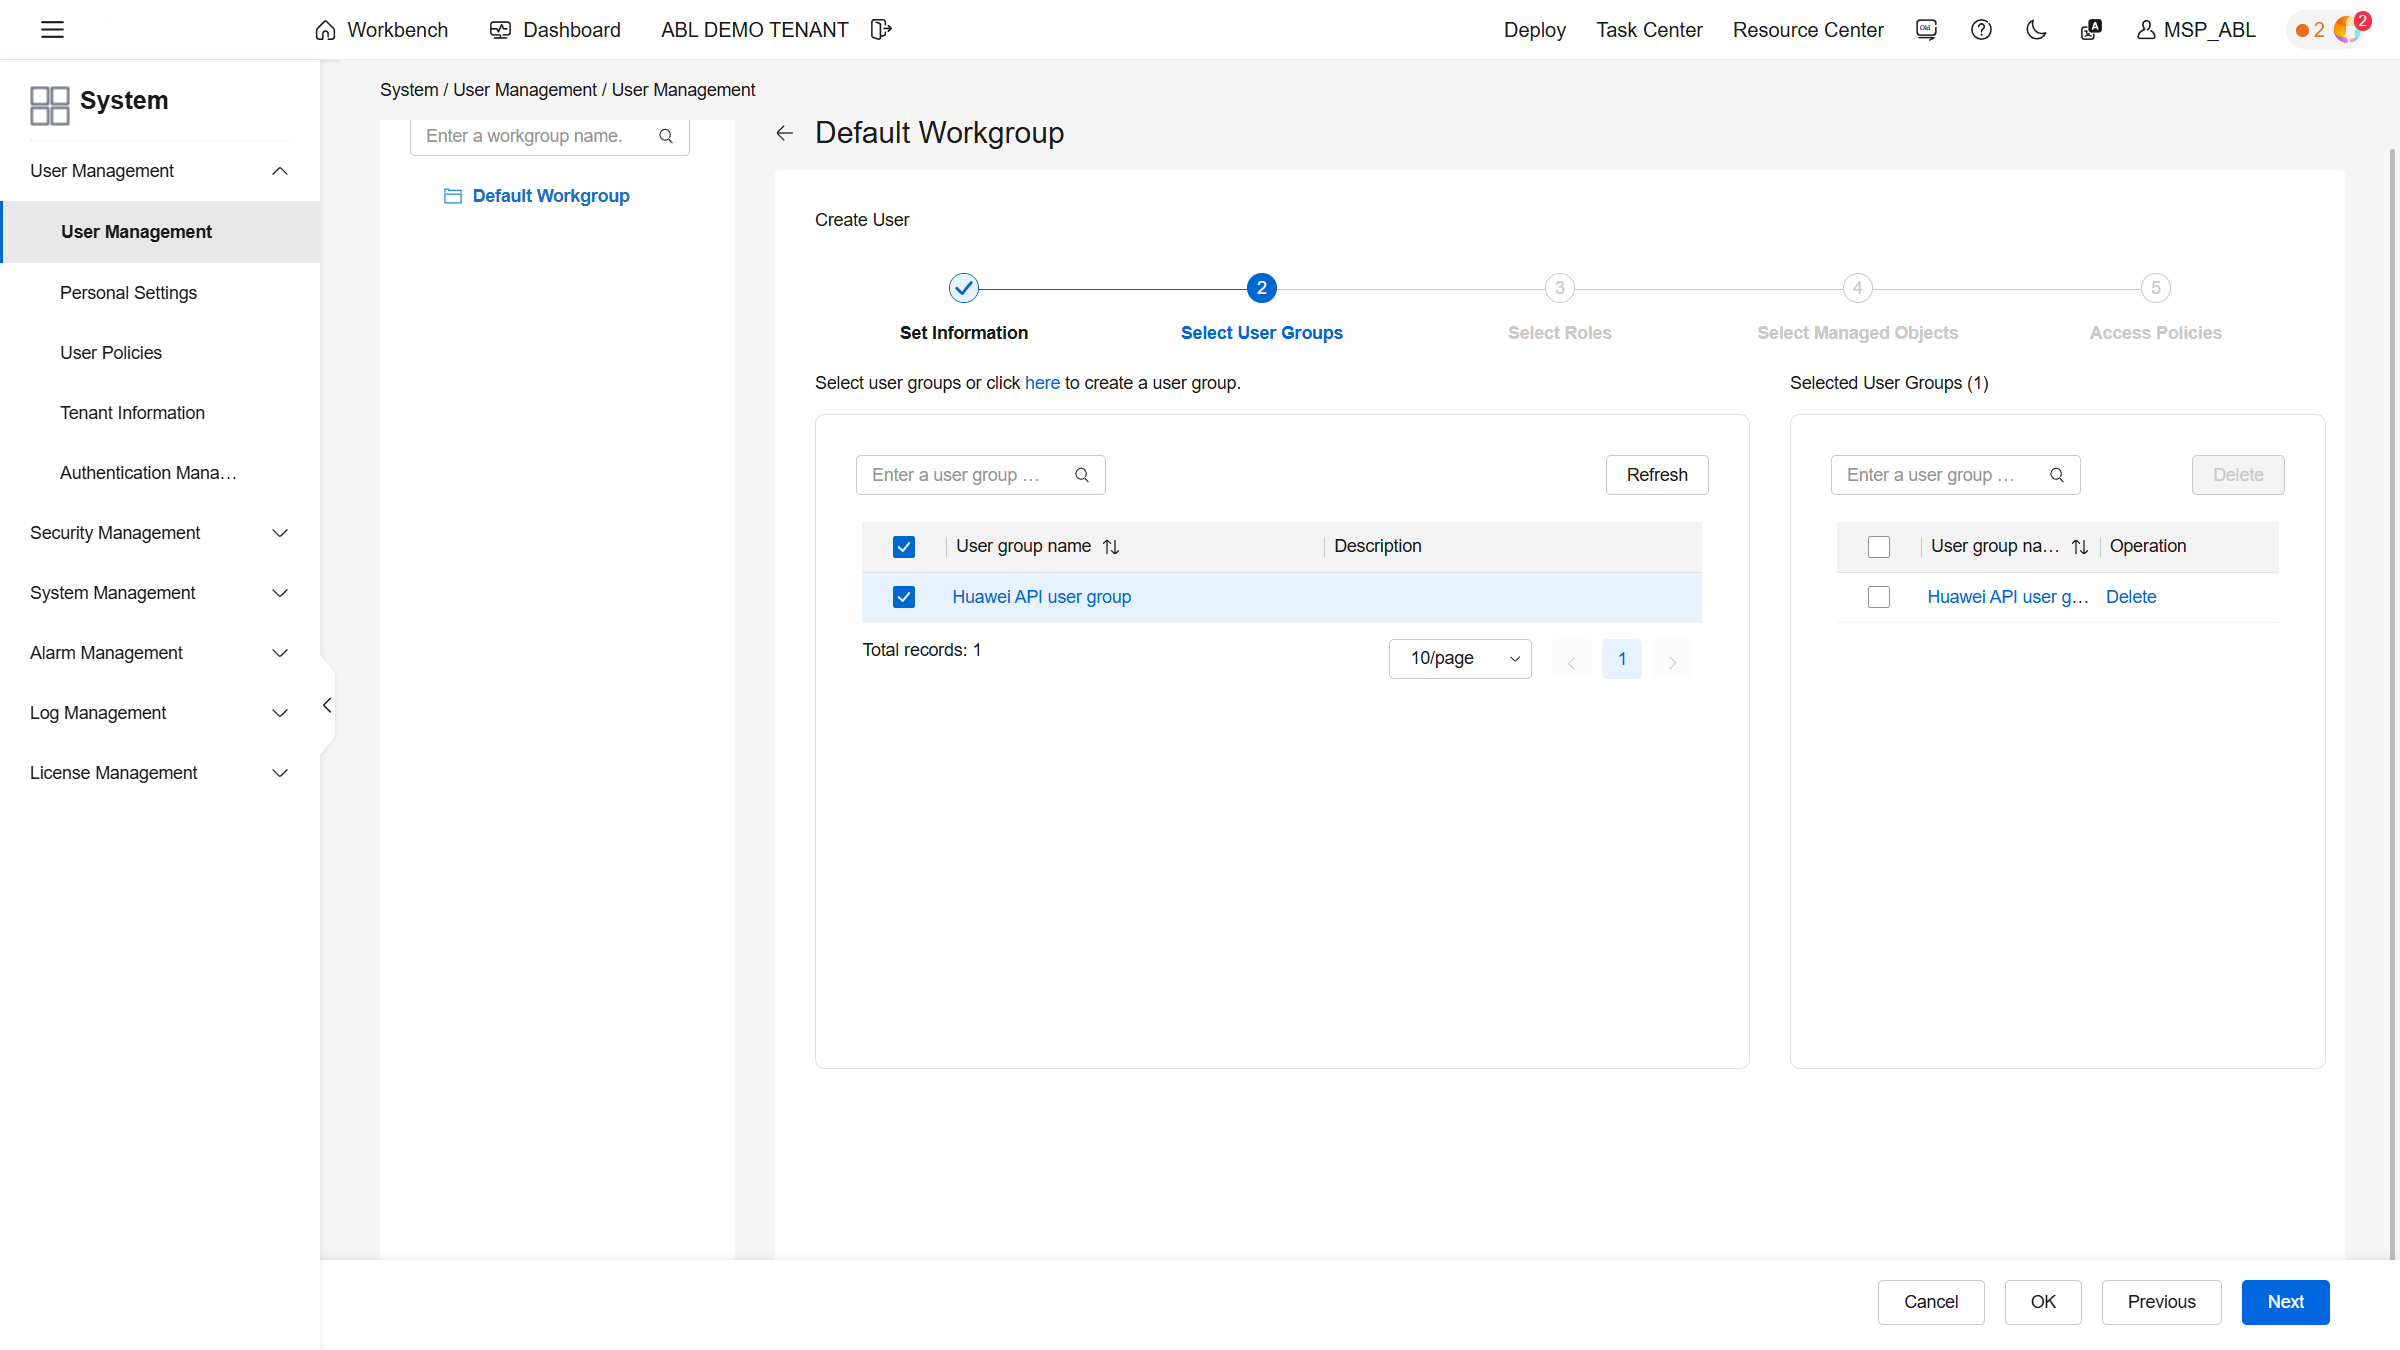
Then select the user group created earlier.
Assign the Open Api Operator role.
Then select all resources.
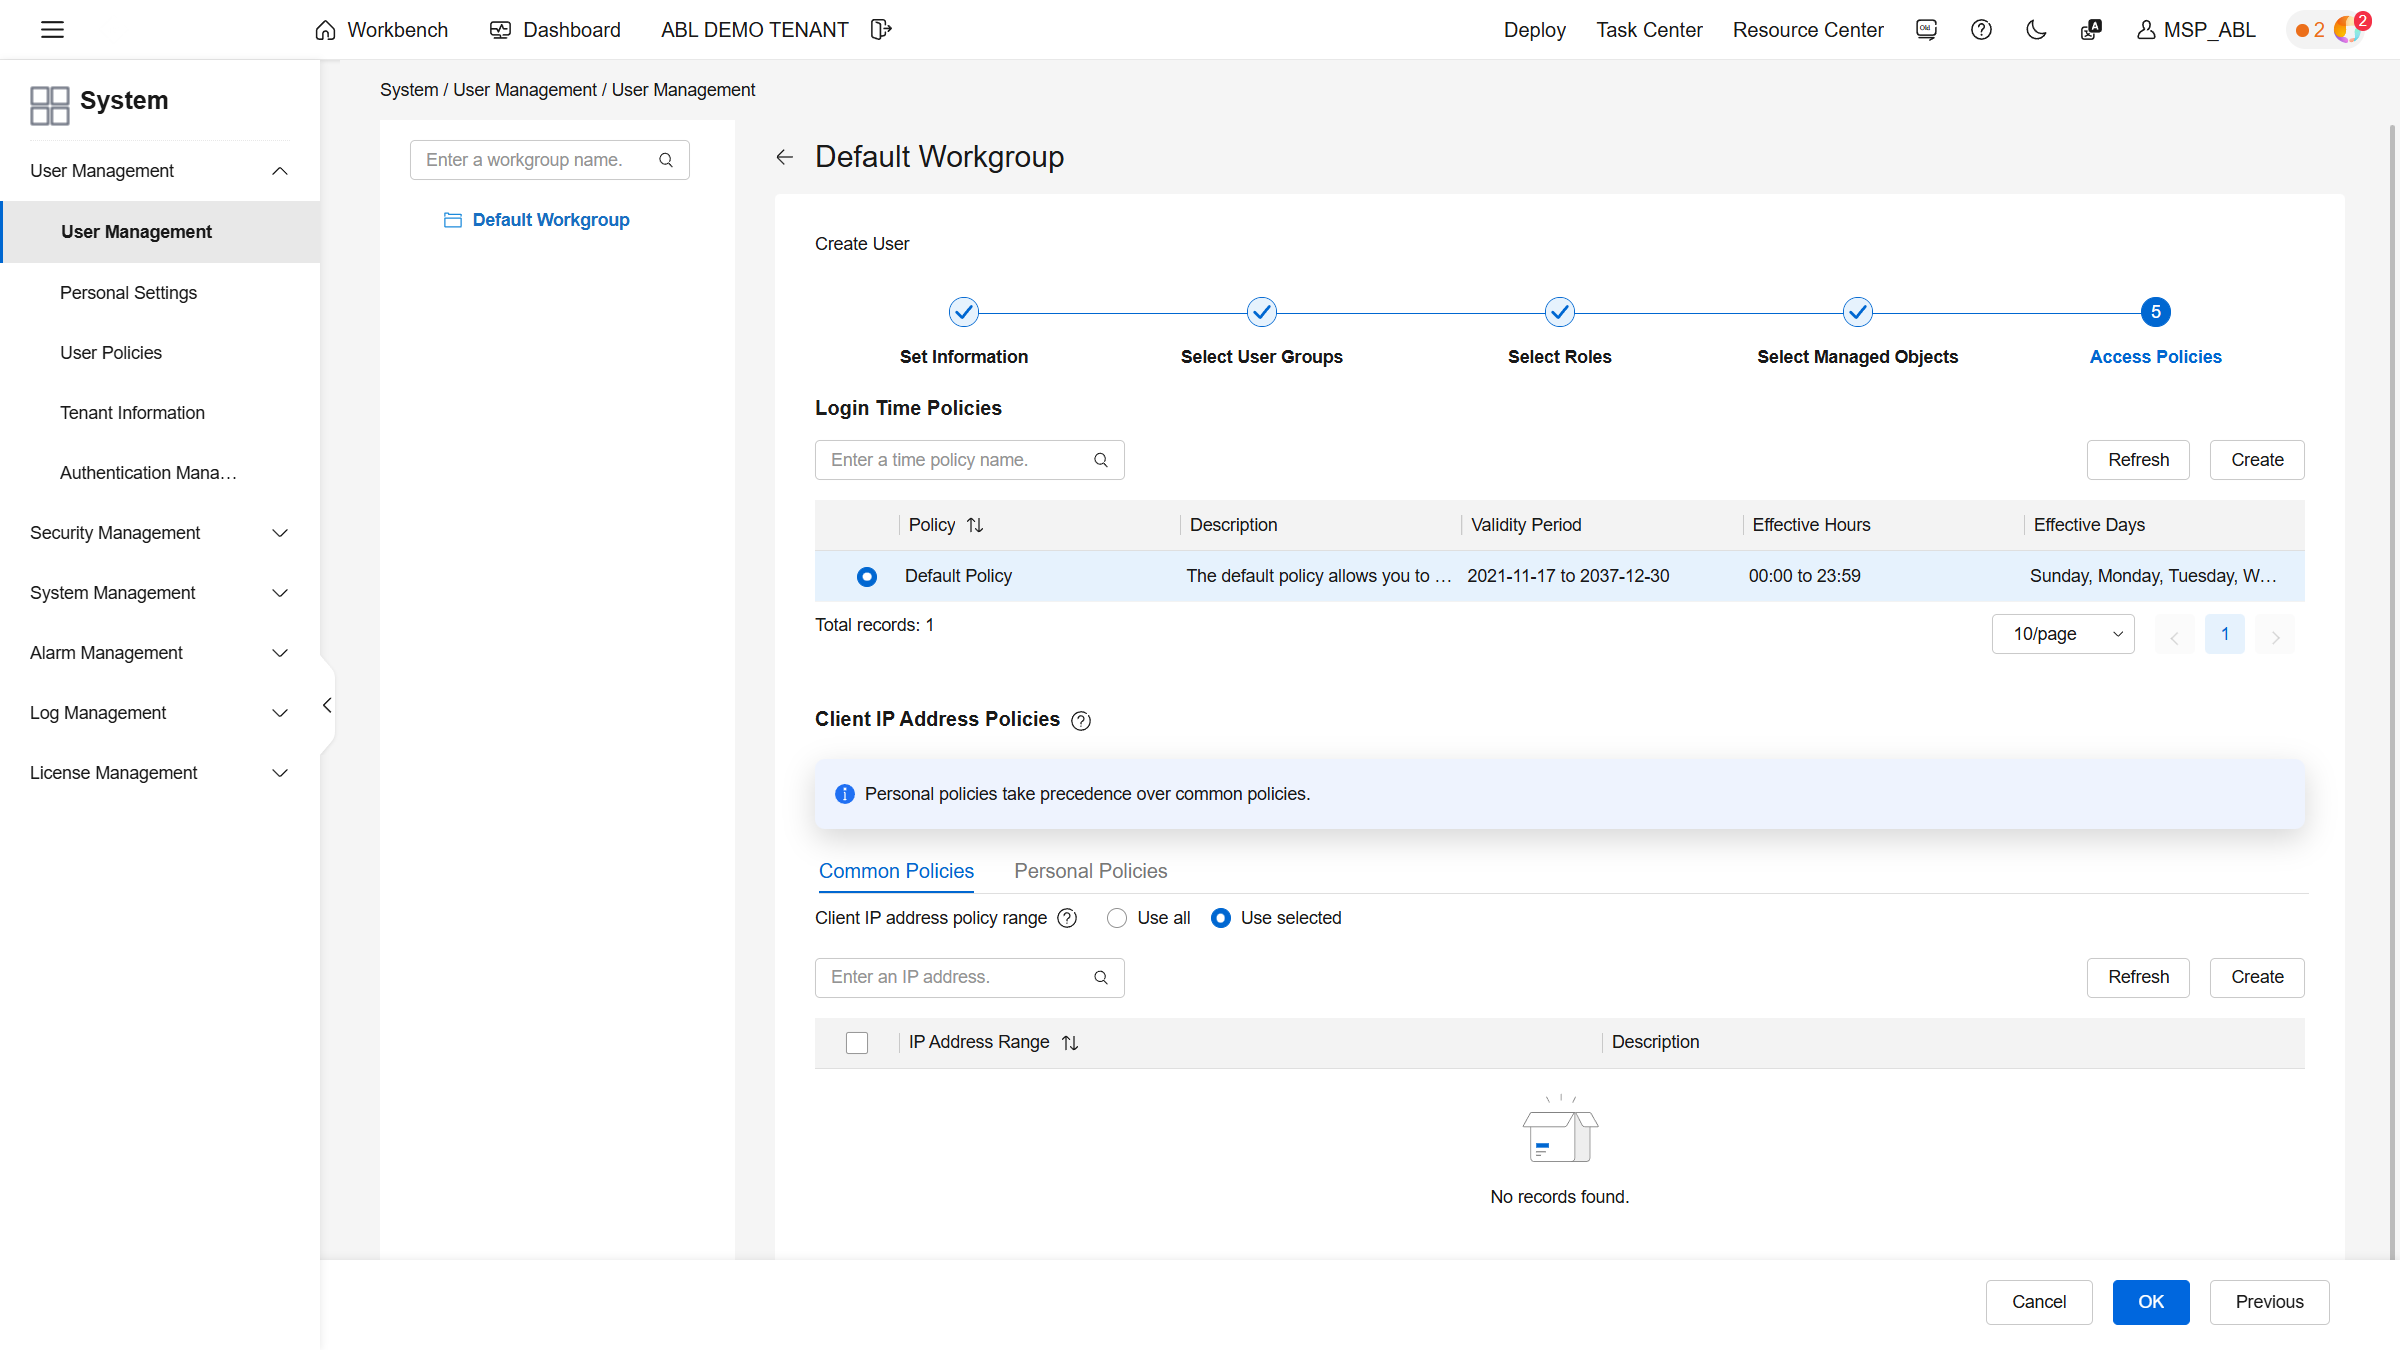
The access policies remain unchanged.
Creating ACLs
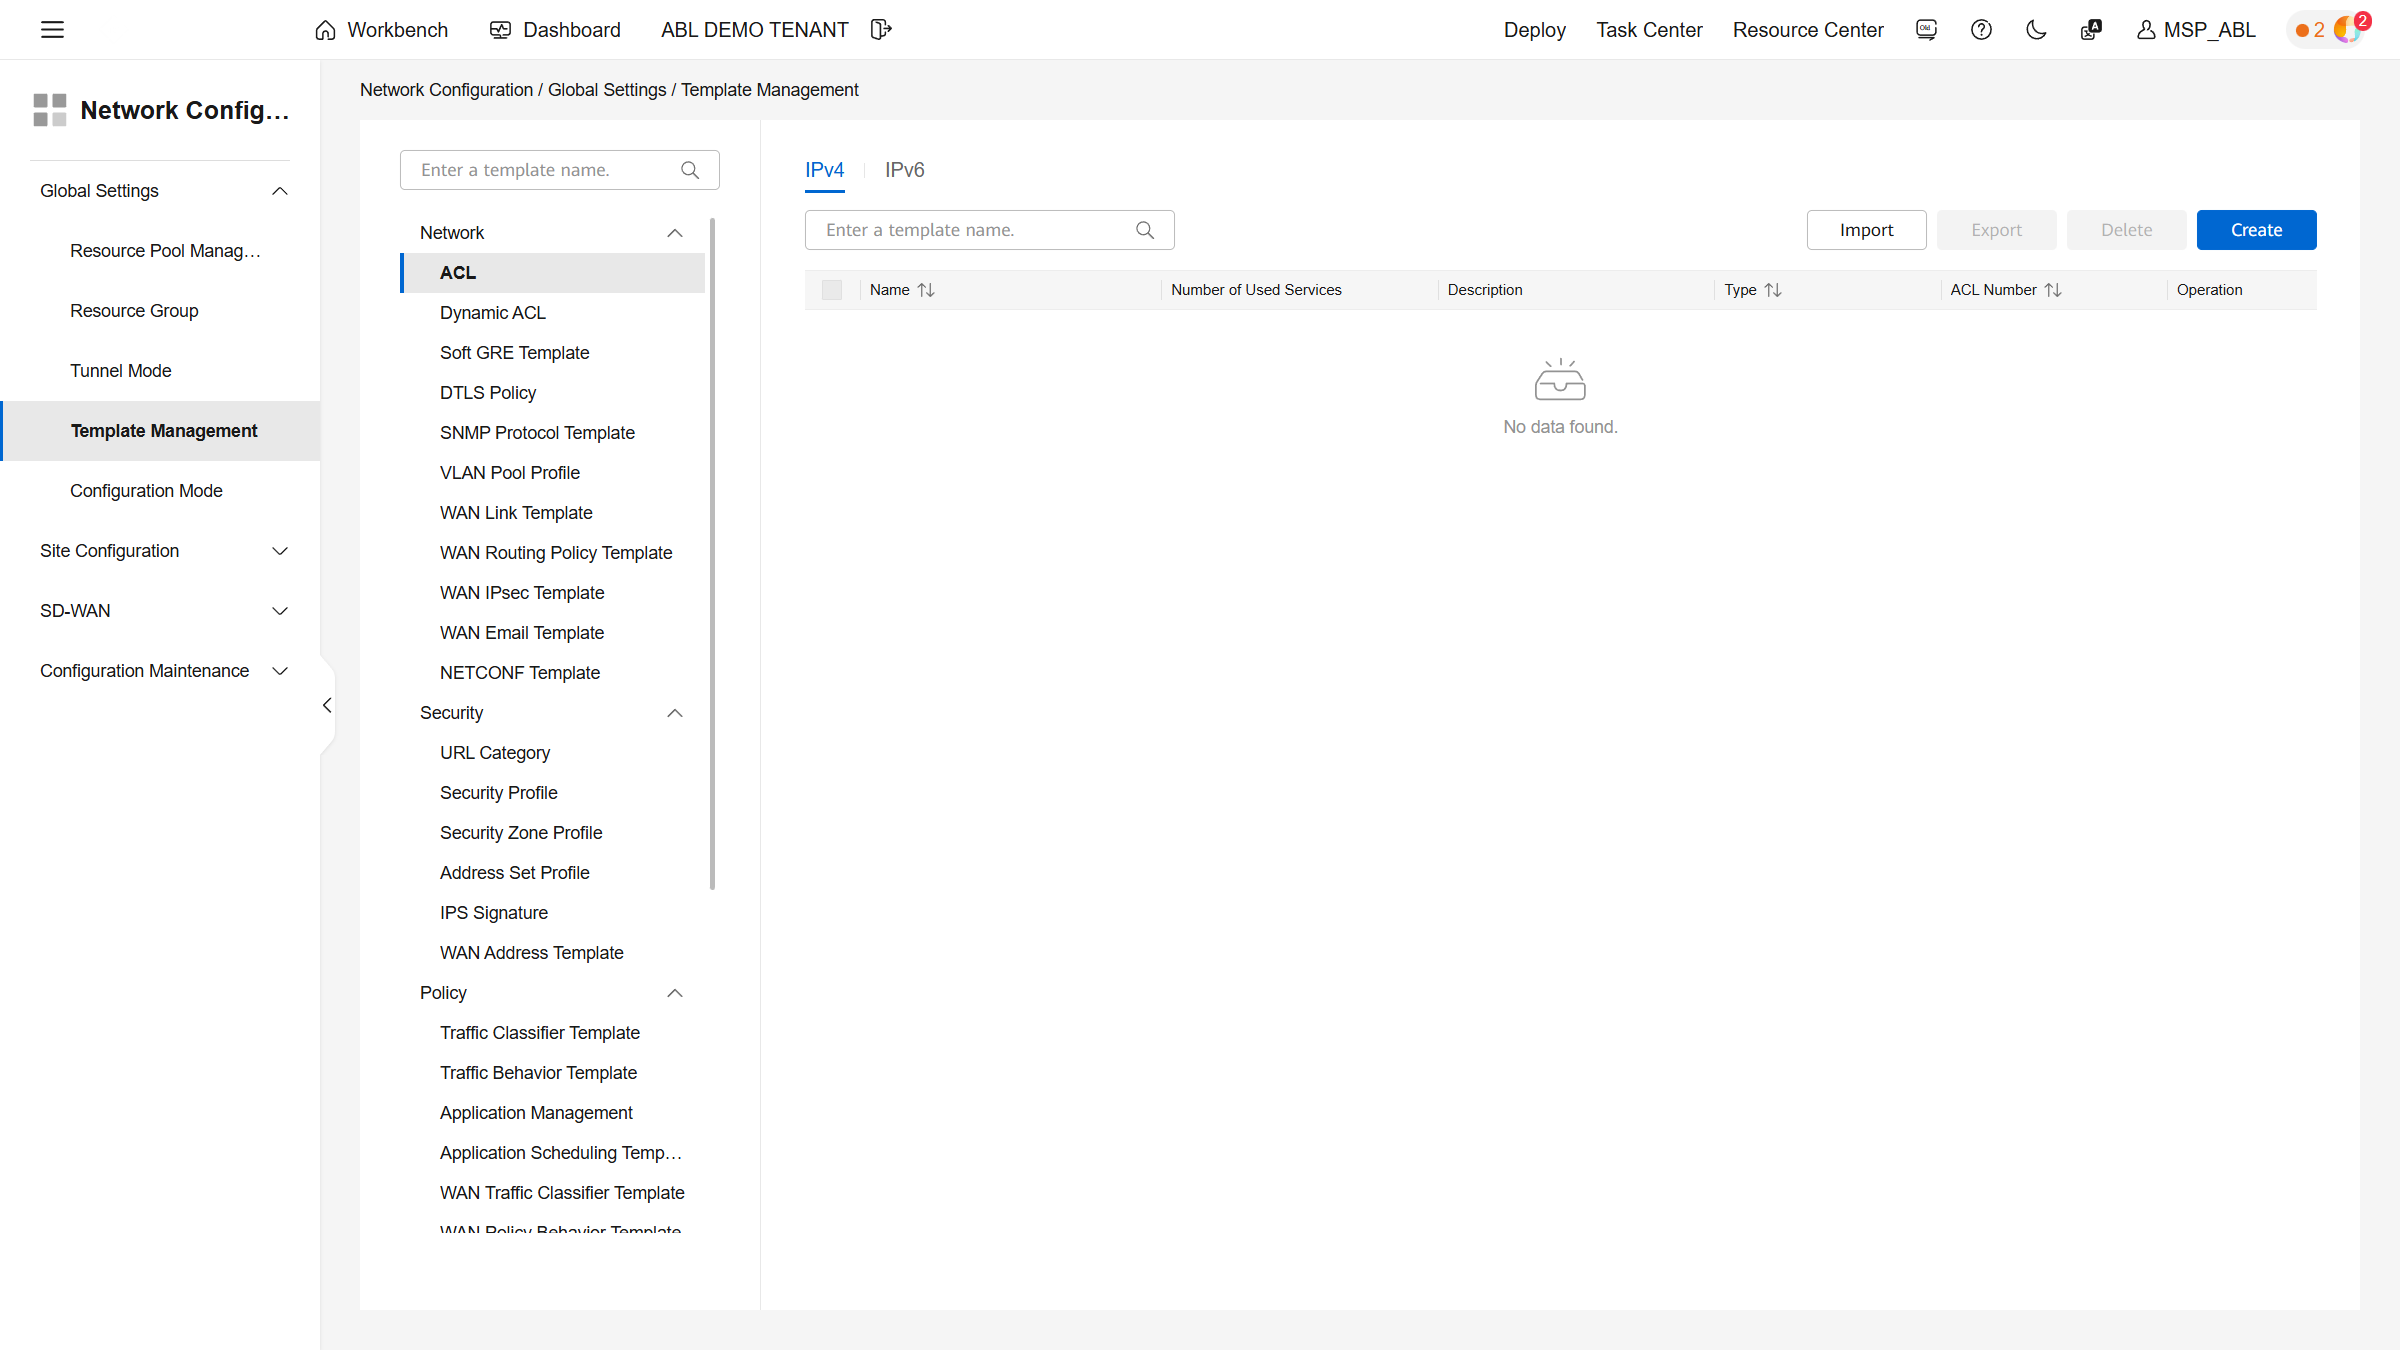
Under Plan → Network Design → Template Management → Policy Template → ACL, create two ACLs.
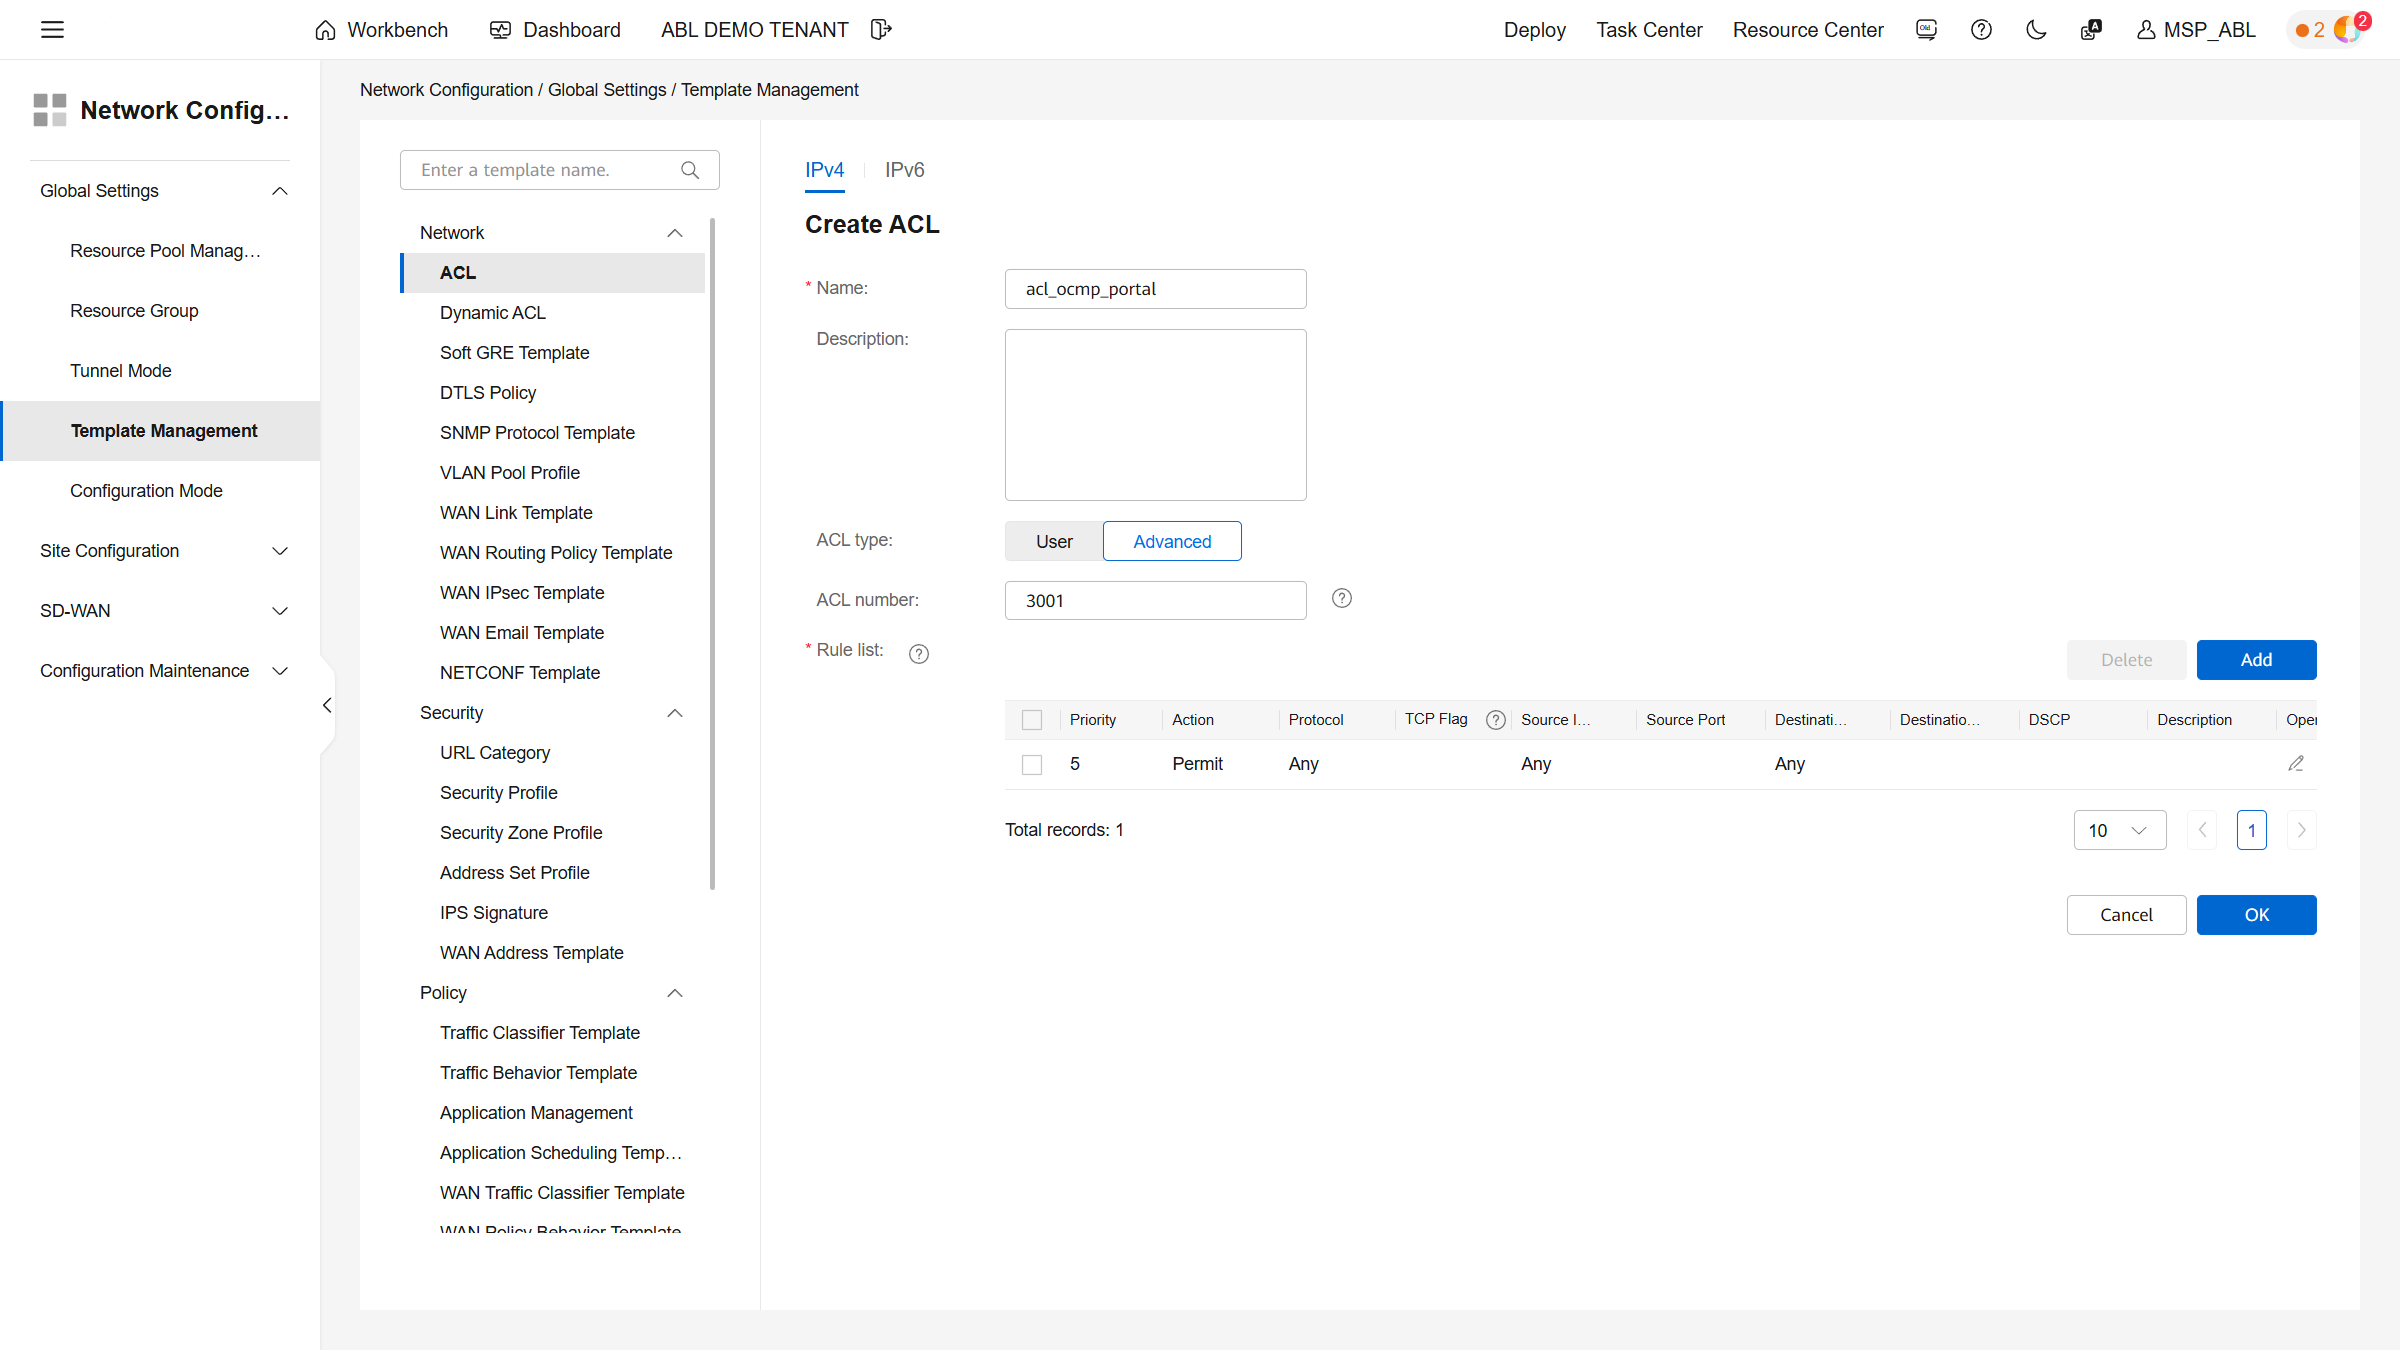
Create the first ACL, acl_ocmp_portal, as an Advanced ACL with a fixed number.
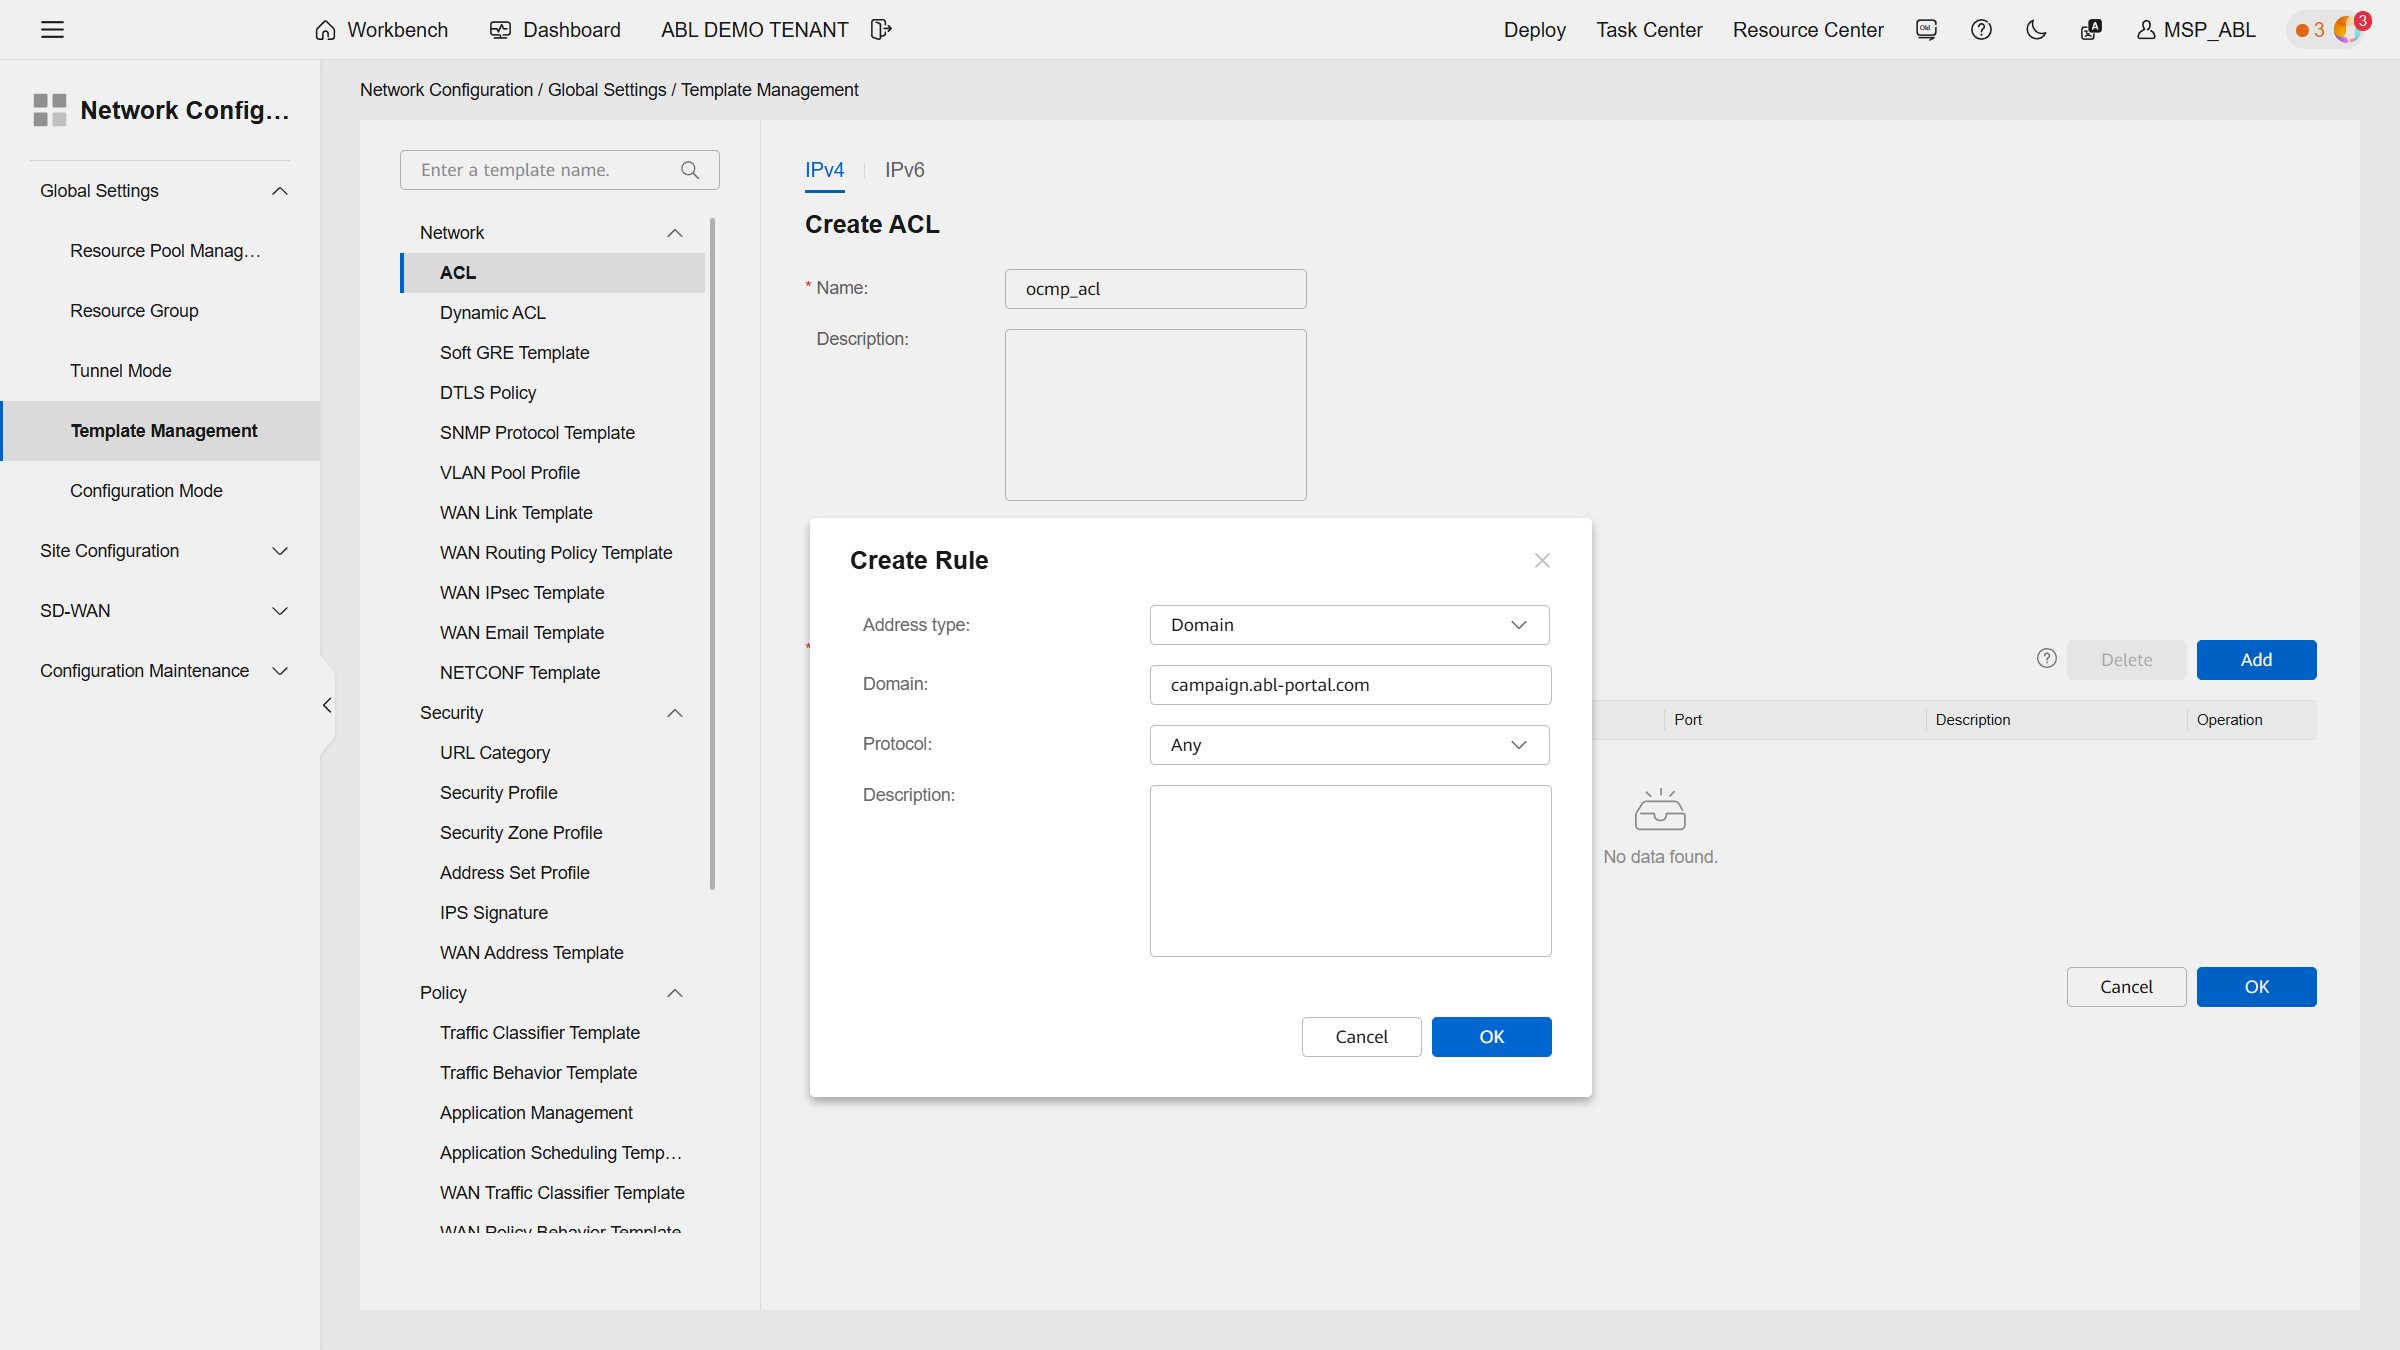
The second ACL, ocmp_acl, contains all domains and IP addresses that must be reachable for the captive portal, acting as the Walled Garden. Add one rule for each address.
Creating a Portal Page Push Policy
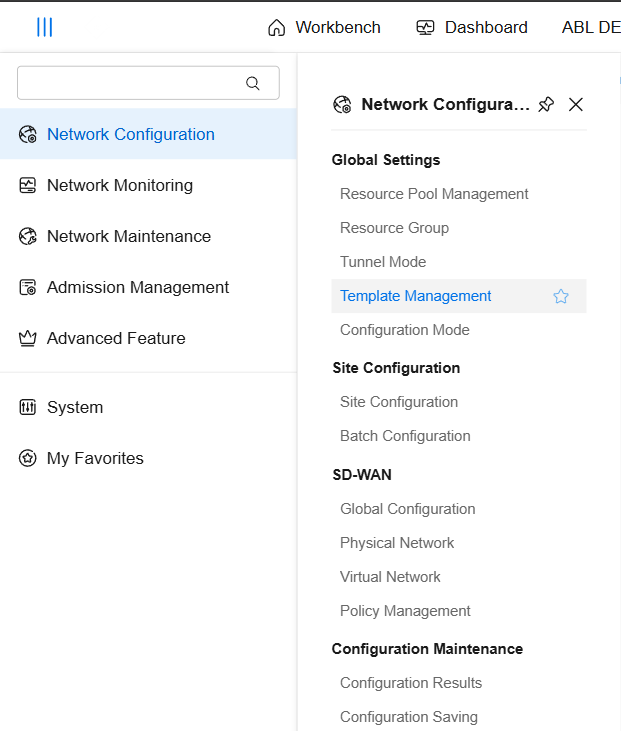
In the Policy → Admission Resources → Page Management menu, create a new Portal Page Push Policy.
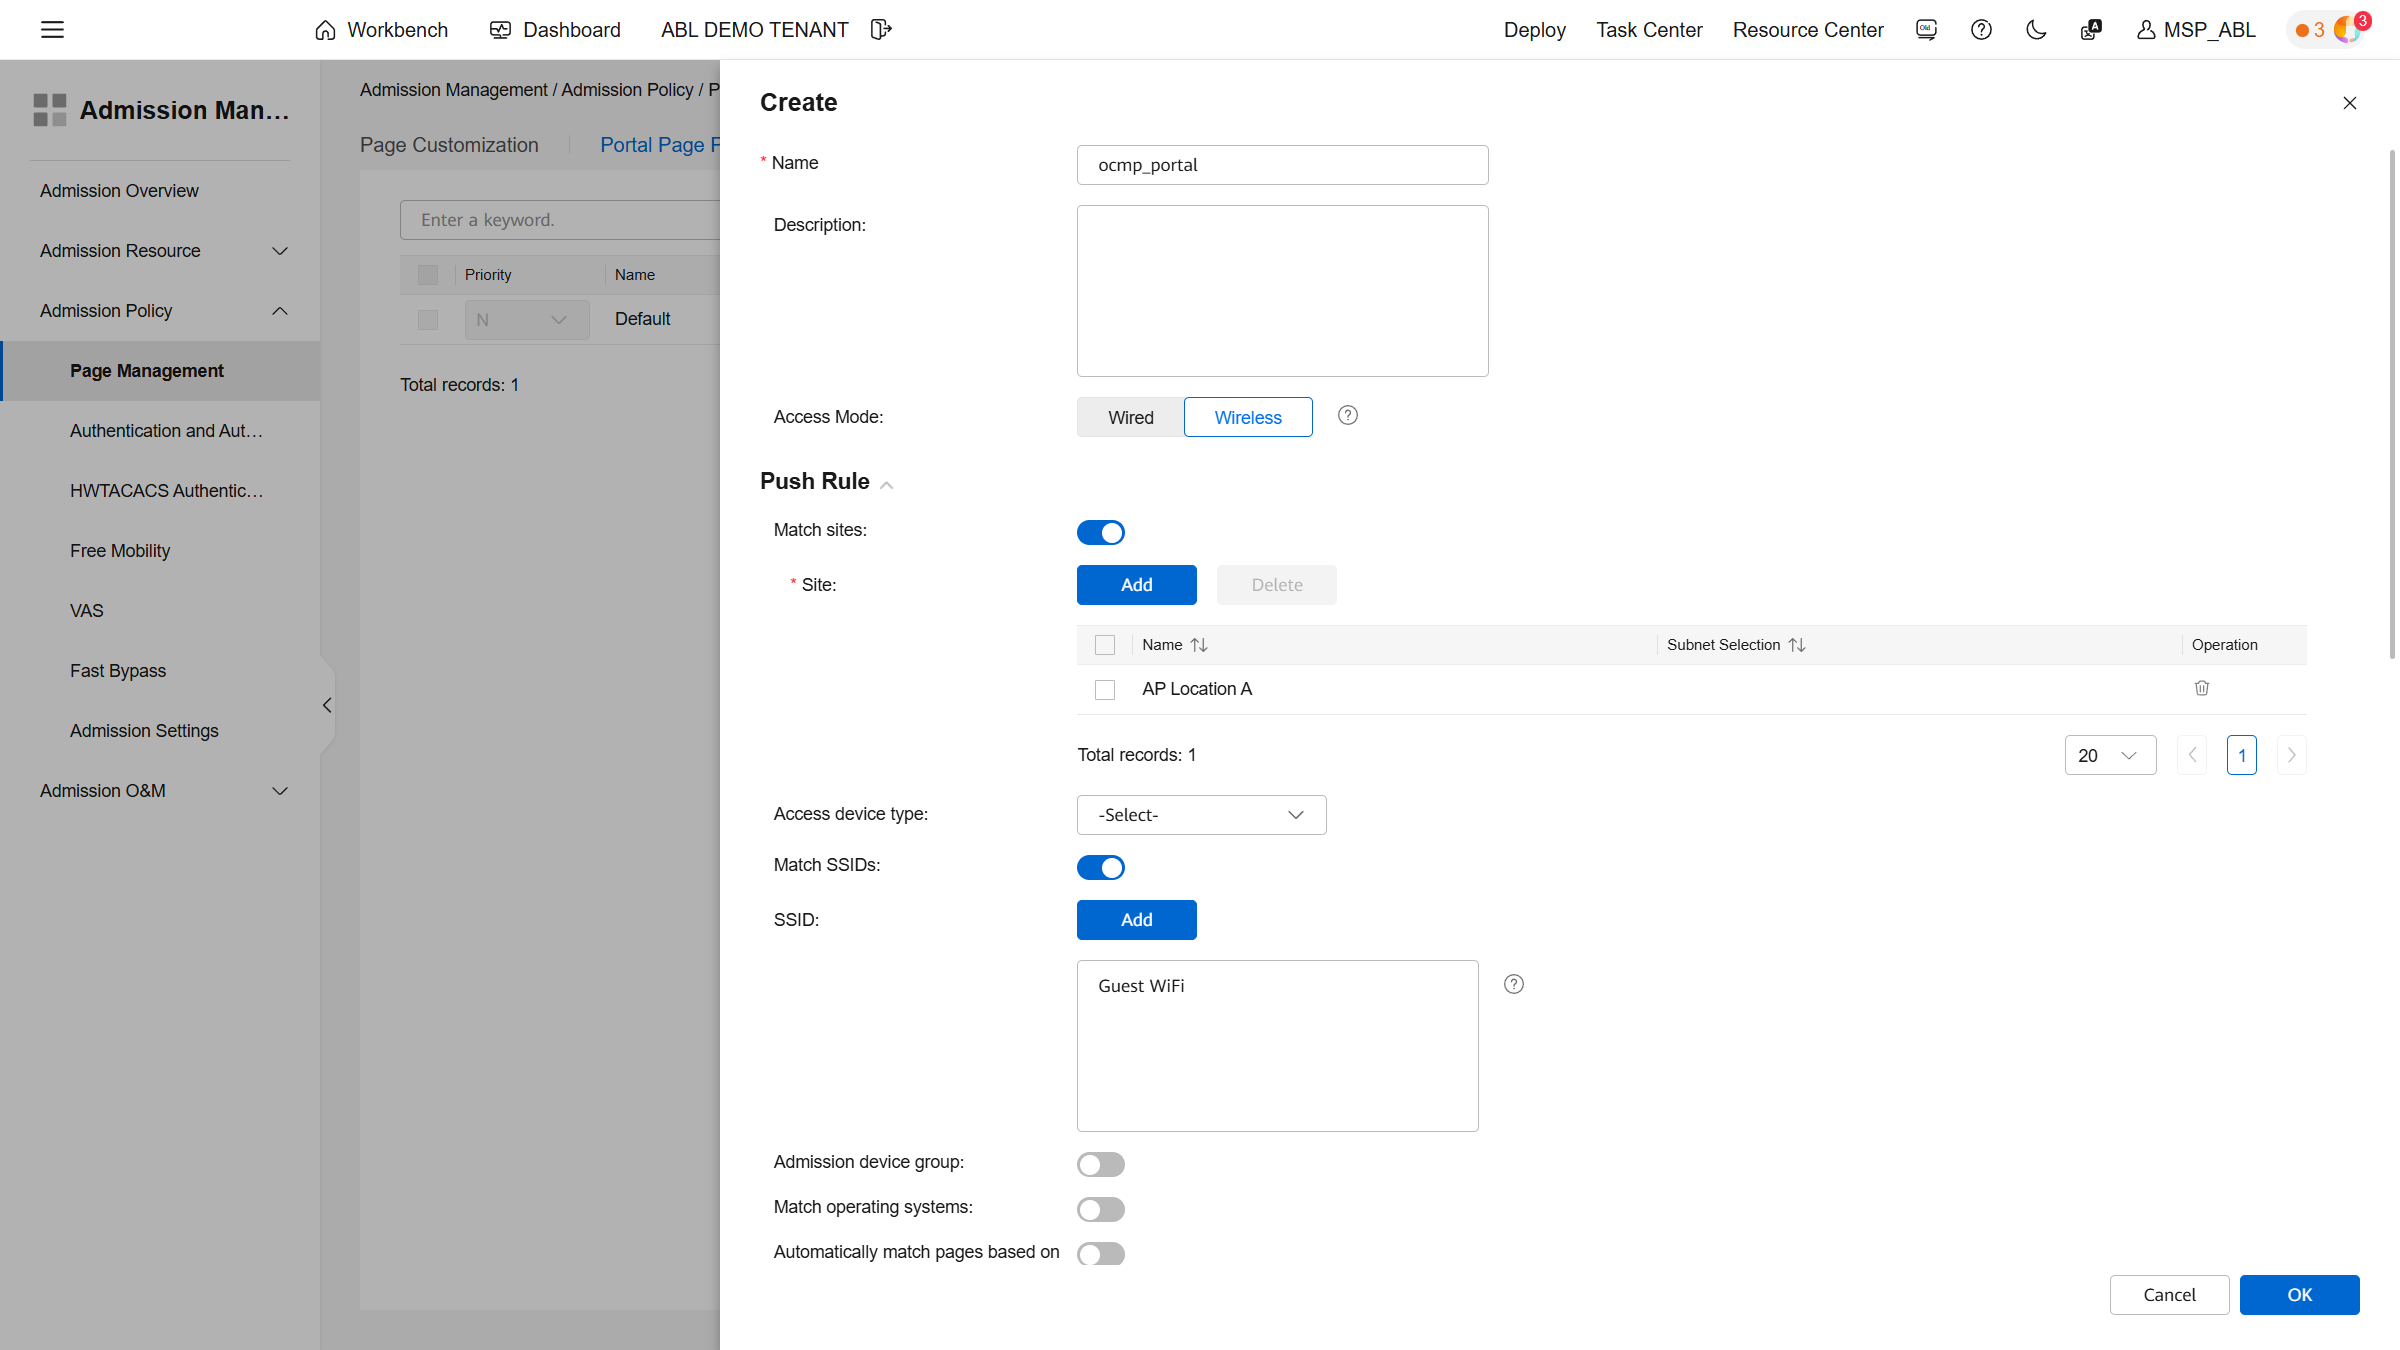
Configure the policy as follows:
- Name:
ocmp_portal - Access Mode: Wireless
- Authentication: Cloud platform-based relay authentication
- Third-party URL: OCMP splash page URL
Then assign the policy to the desired locations.
Configuring Authentication
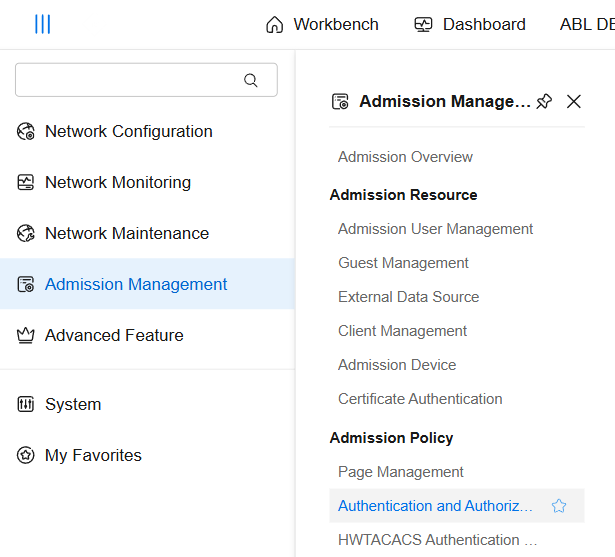
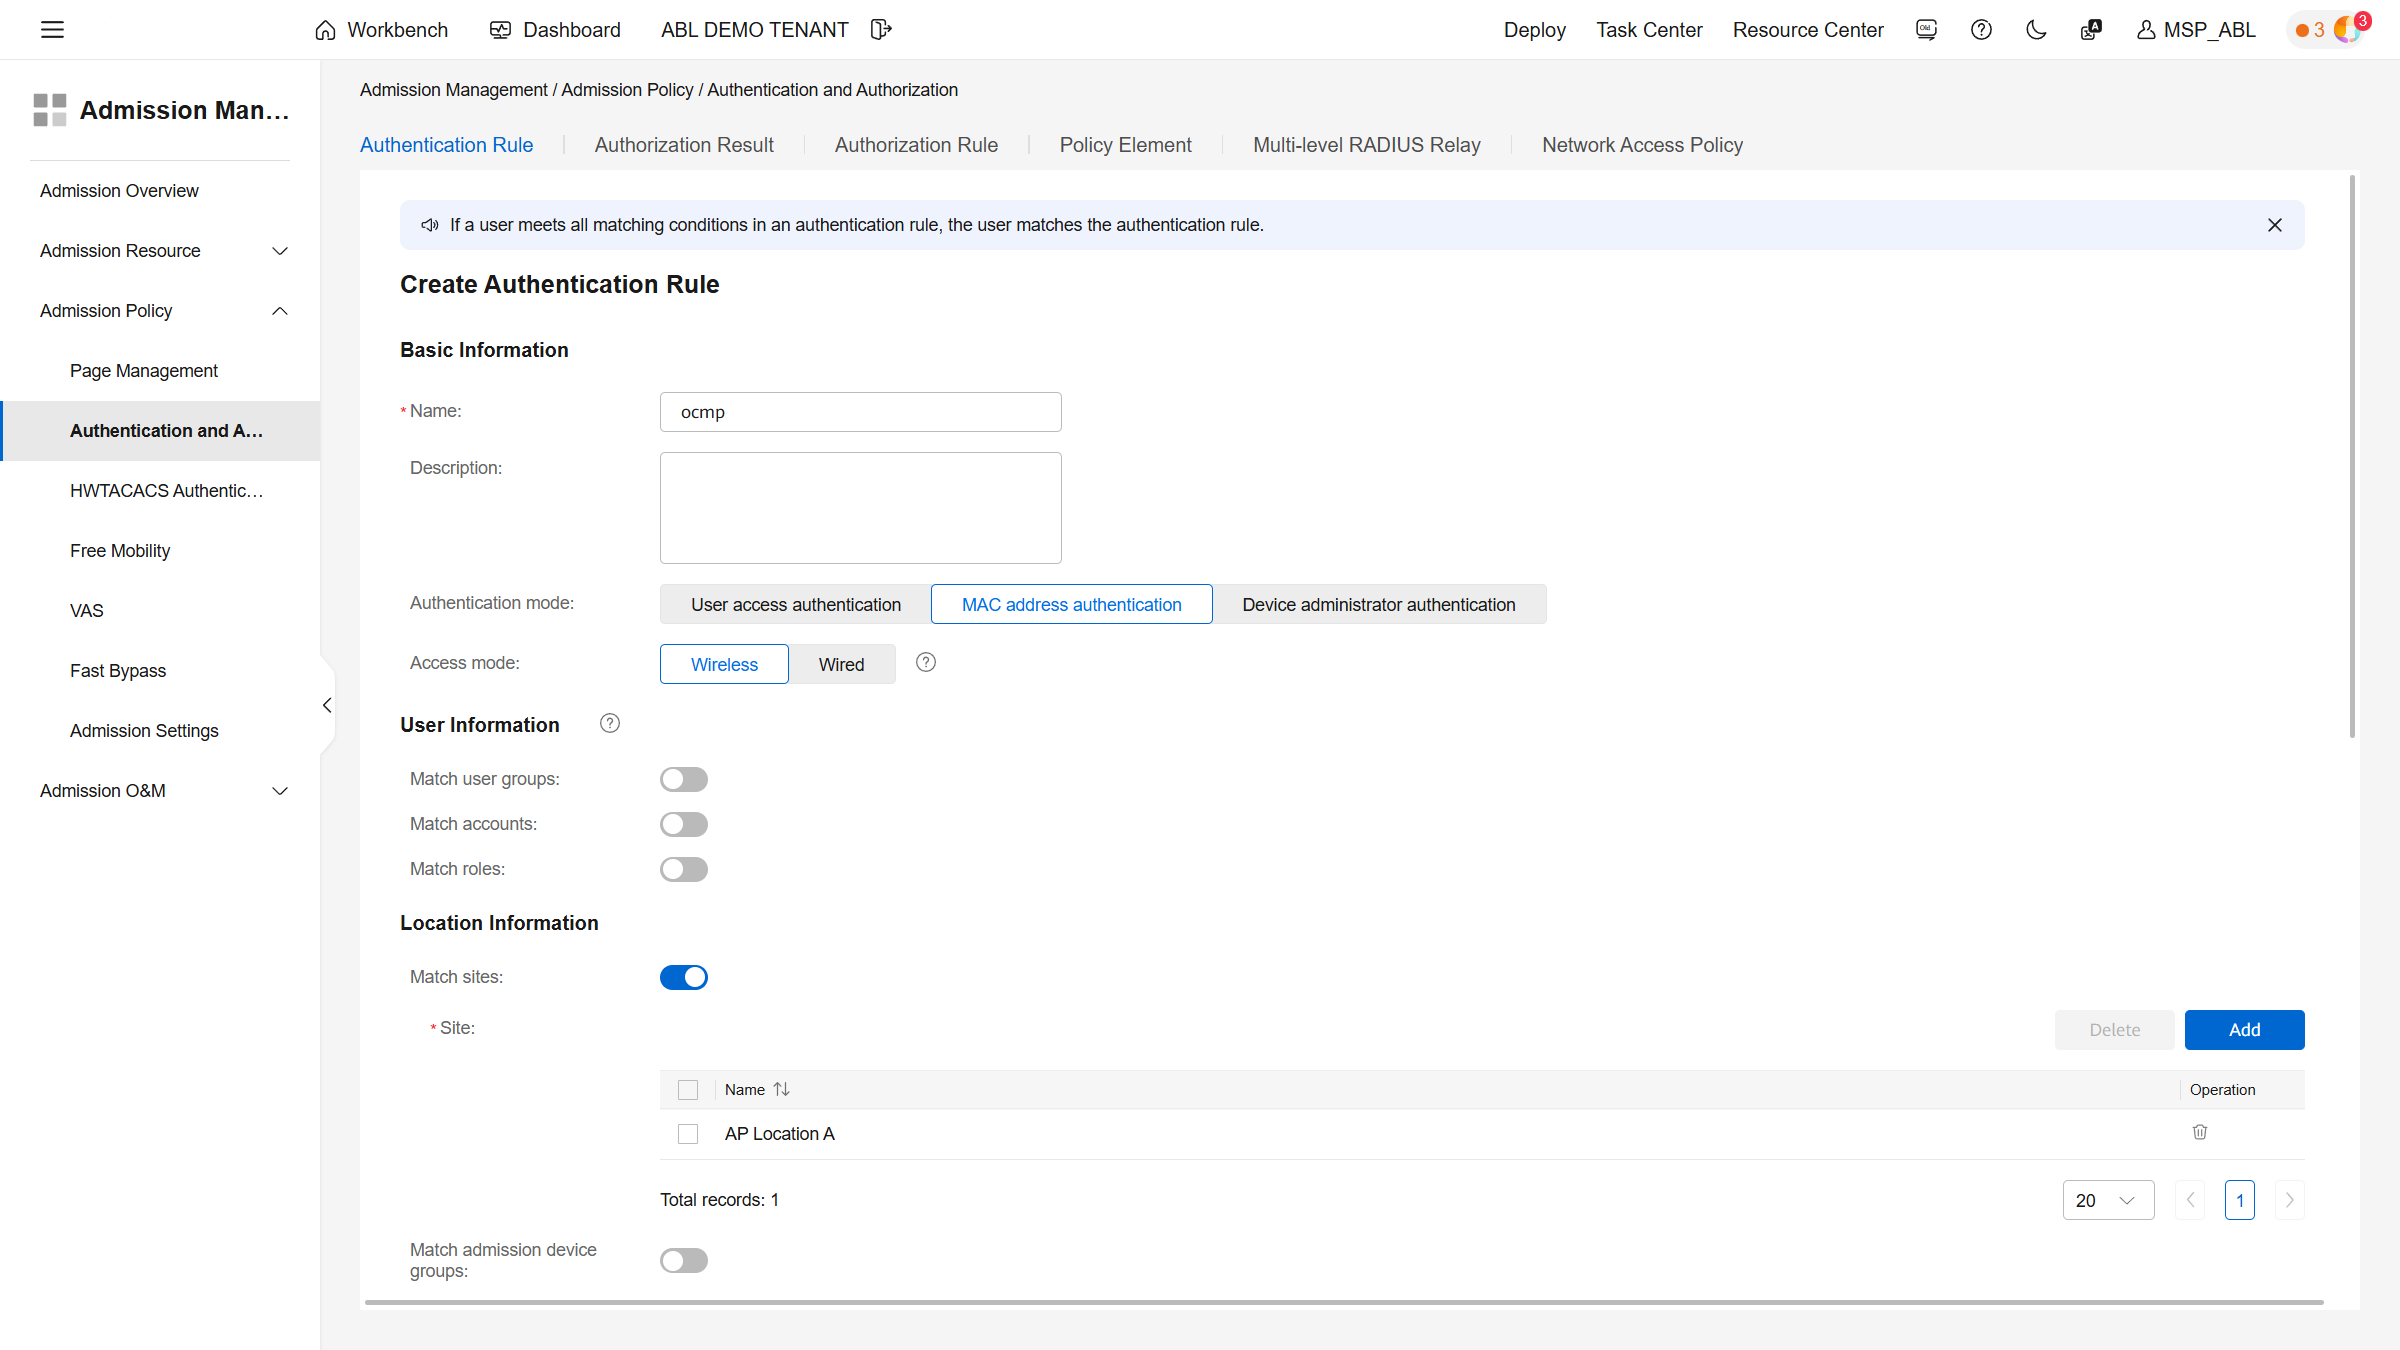
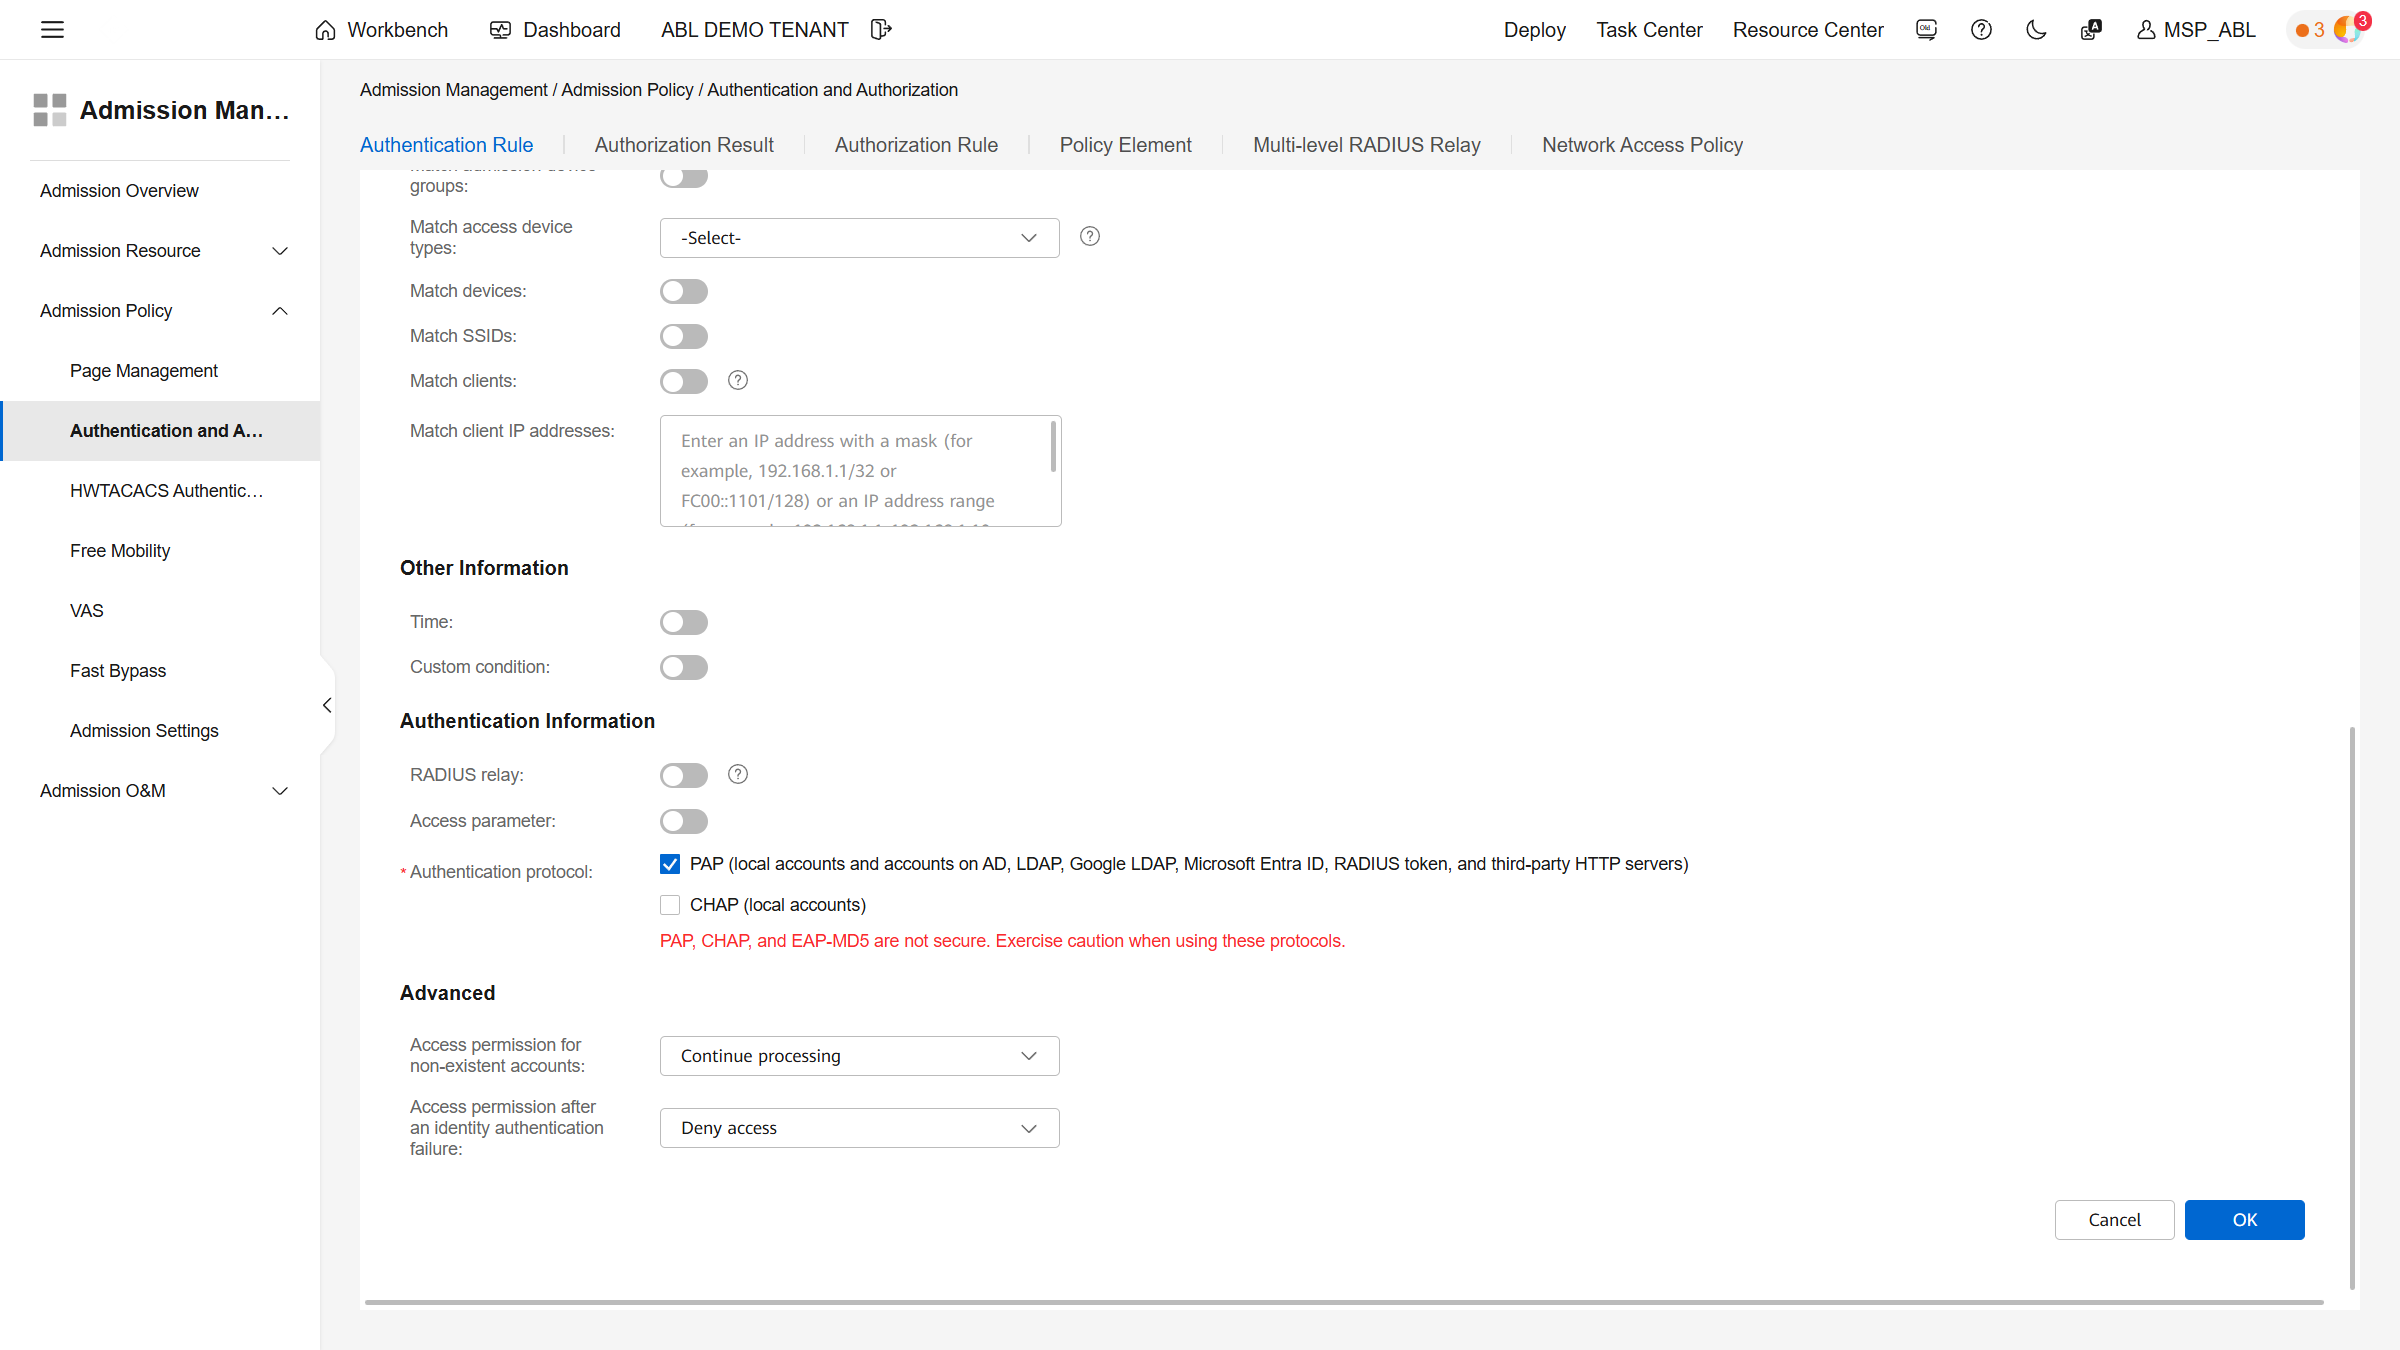
Under Policy → Admission Policy → Authentication and Authorization, adjust the existing rules.
Activate EAP-PEAP-MSCHAPv2 in the authentication protocol.
Then create an authorization result:
- Name:
ocmp_auth_result - ACL:
acl_ocmp_portal
Assign this result to the locations.
Next, create a new authorization rule:
- Name:
ocmp_rule - Enable Portal-HACA
- Assign sites
- Select authorization result
Configuring the SSID
In Site Configuration → AP → Wi-Fi, create a new SSID or adjust an existing one.
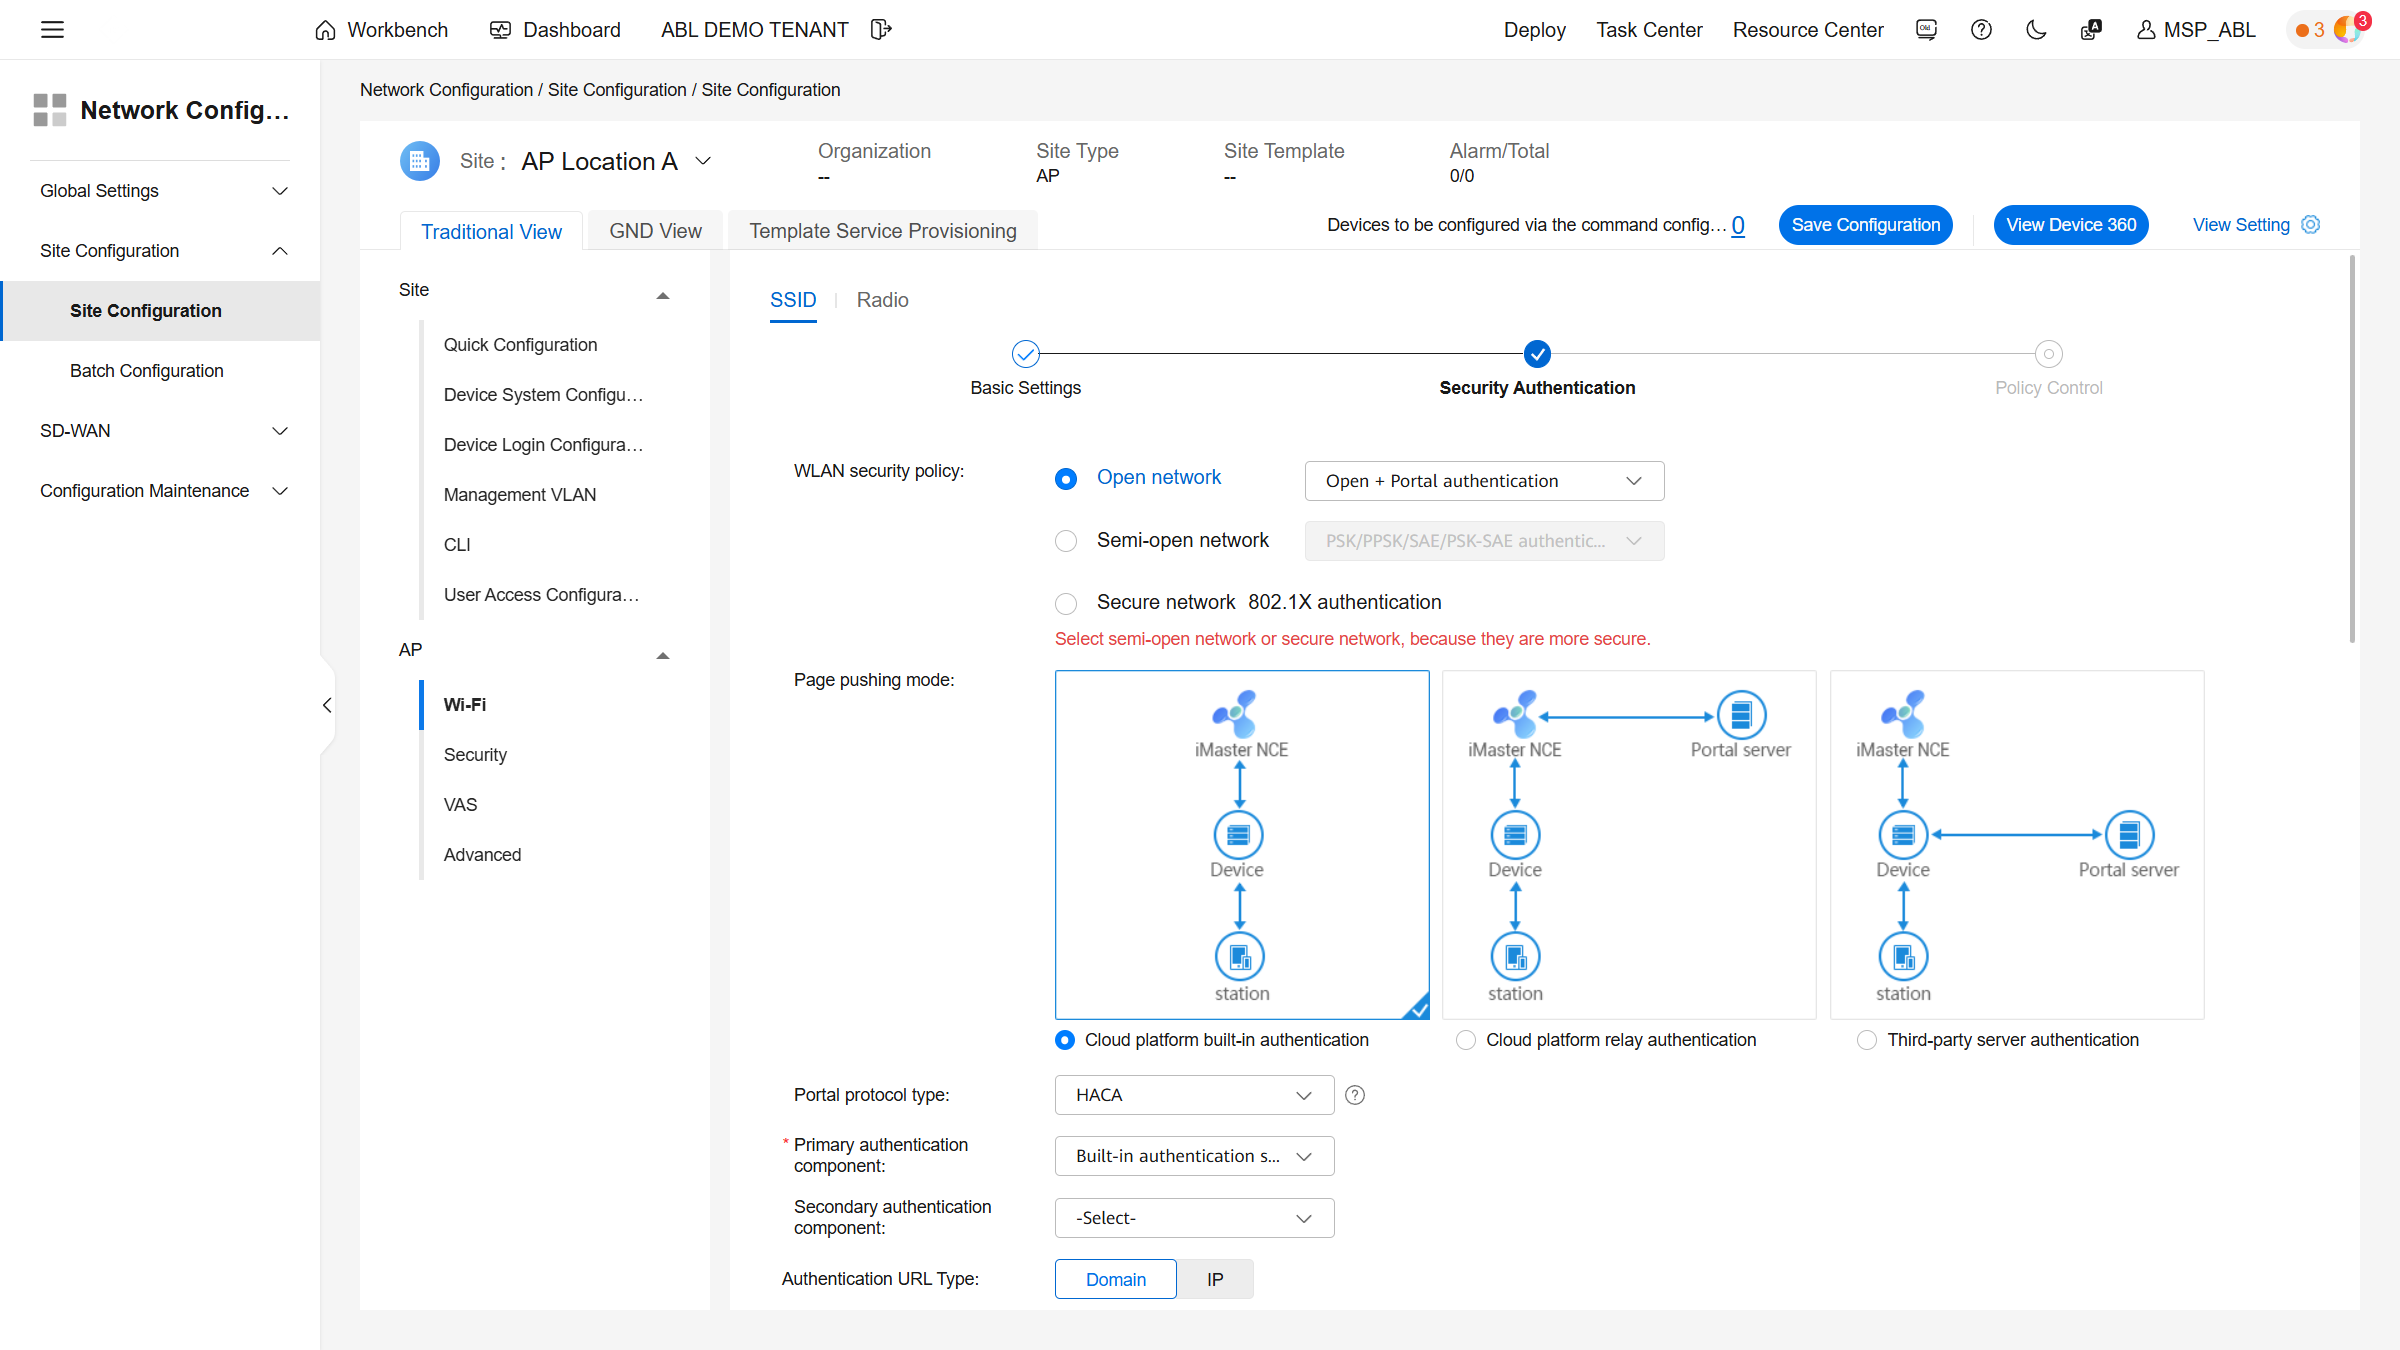
Important settings:
- Security: Open + Portal authentication
- Page Push Policy: Relay authentication
- Default Permit Rule:
ocmp_acl - Enable Bypass Policy